
Sunday, 28 February 2021
Animal Crossing - Blue Joy Con Controller - update #1
Last night I had a very bad time concentrating on my cross stitch. I think I frogged the “+” button outline about 5 times before getting it correct. After that I gave up and went to bed. I sure hope tonight will be better.
Saturday, 27 February 2021
Animal Crossing - Blue Joy Con Controller
Last night as I was finishing the blue joy con outline, the bottom didn’t meet with the top part. The top was off by one stitch, too many black stitches. The long stretch of black stitches should only have 22 stitches, but I had 23. I had to frog all of the black at the top of the controller. I restitched the black at the top of the controller.
I then started stitching the “+” button, unfortunately I stitched too far down and now I have to frog this part. I think I should have stopped earlier last night.

I then started stitching the “+” button, unfortunately I stitched too far down and now I have to frog this part. I think I should have stopped earlier last night.
Friday, 26 February 2021
Animal Crossing - Switch Frame - update #18
Last night I finished all of the black around the edge of the switch screen.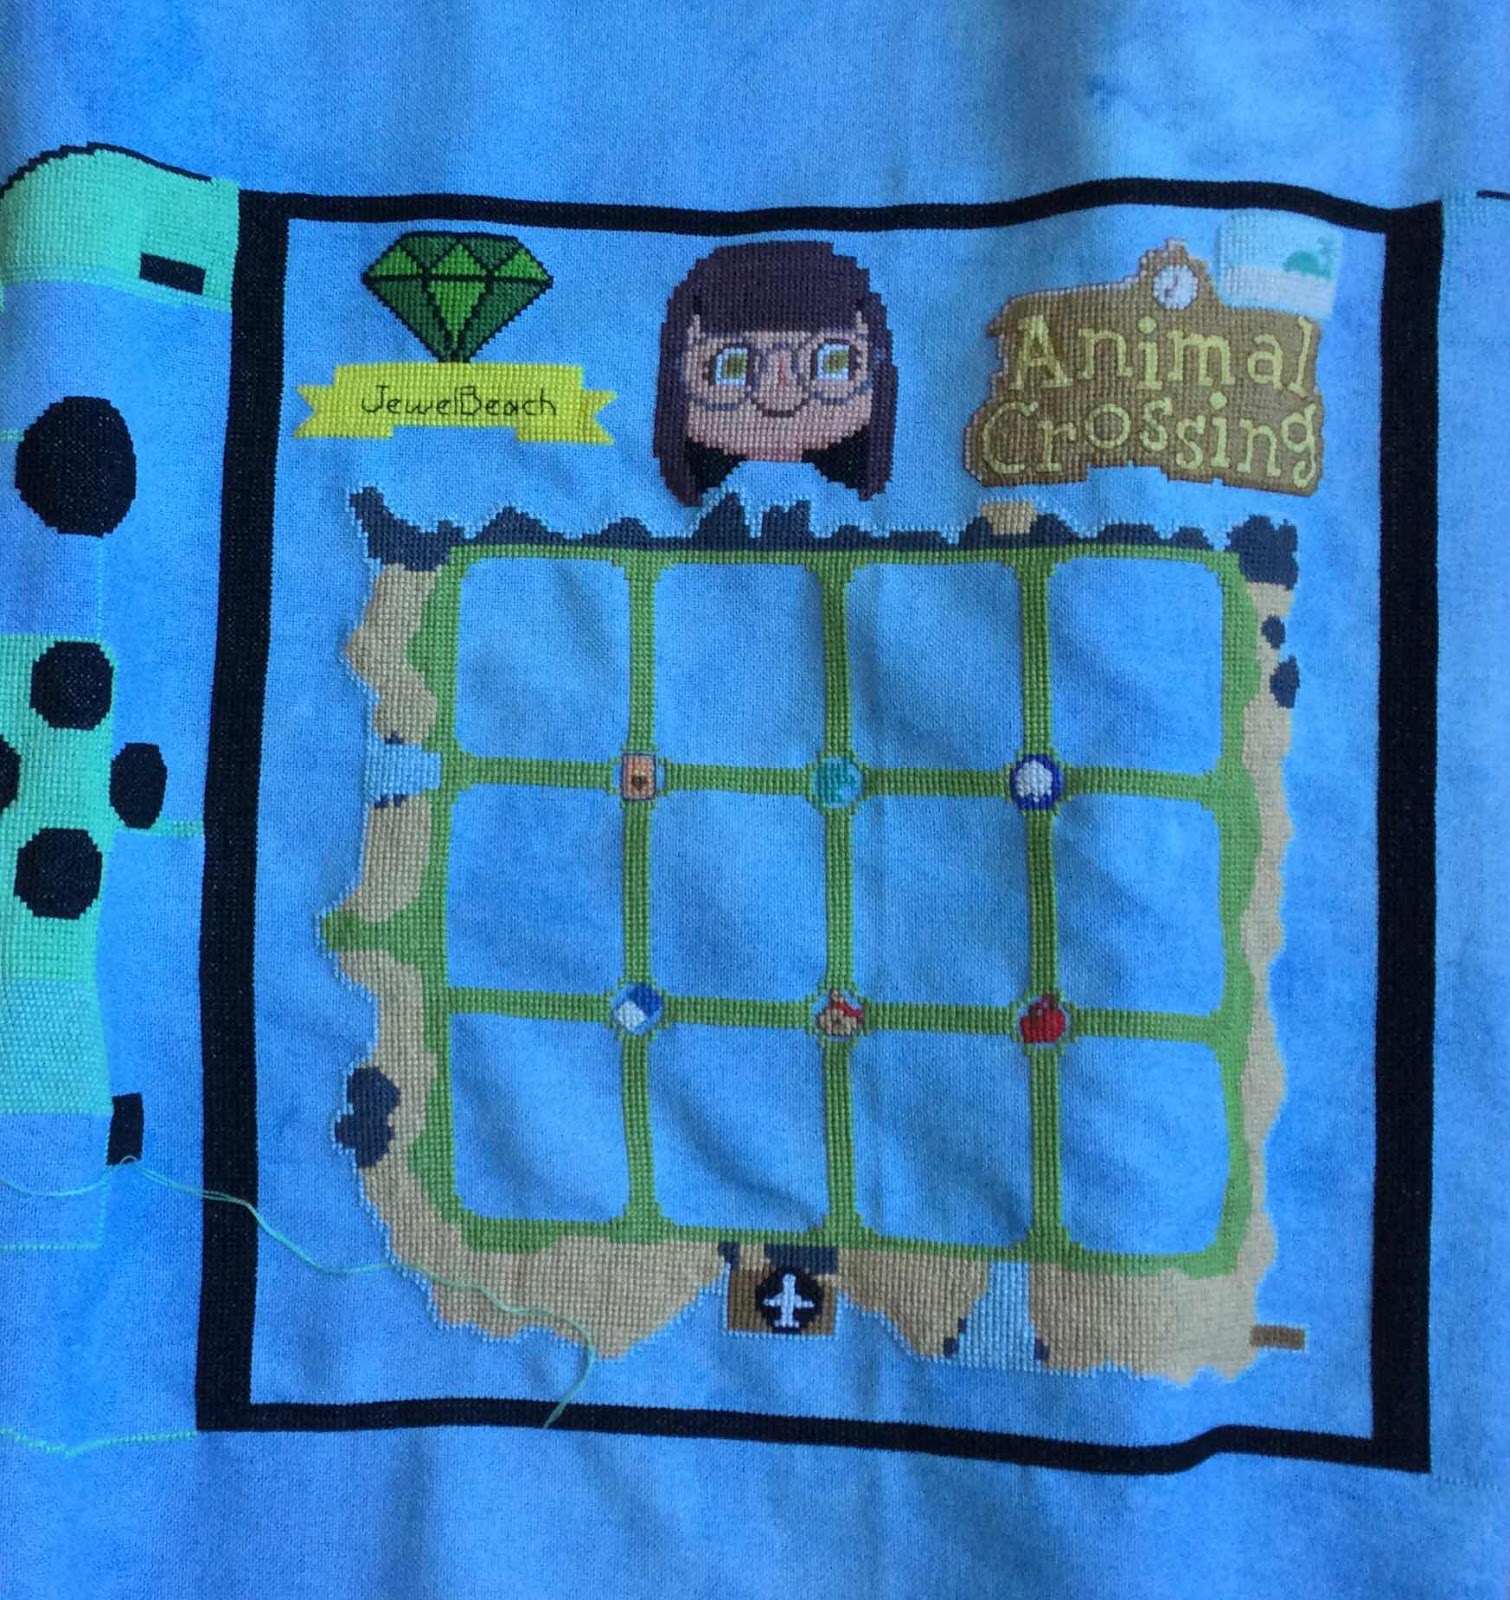


I worked a bit on the green joy con controller (crossed some of the half green stitches under the 4 black buttons) while I had the project unrolled on this side.
I remembered that I said on my blog that I was going to work on the blue joy con controller outline. I worked on the bottom (where I had to count) and now I just have to stitch up in a straight line to meet up with the top part.
Thursday, 25 February 2021
Animal Crossing - Switch Frame - update #18
Last night I continued working on the last black edge of the switch frame screen. I'm so excited, almost done with the black edge. Next I will finish the outline on the blue joy con controller.

Wednesday, 24 February 2021
Animal Crossing - Switch Frame - update #17
I’m still working on the last black edge of the switch frame. It seems to take forever to fill in with one colour.
Tuesday, 23 February 2021
Animal Crossing - Switch Frame - update #16
Last night I finished the top black edge, so now I have 3 sides complete on the switch frame screen.
Monday, 22 February 2021
Animal Crossing - Switch Frame - update #15
I completed the bottom and right edges of the switch frame. I still have 2 more edges to finish. 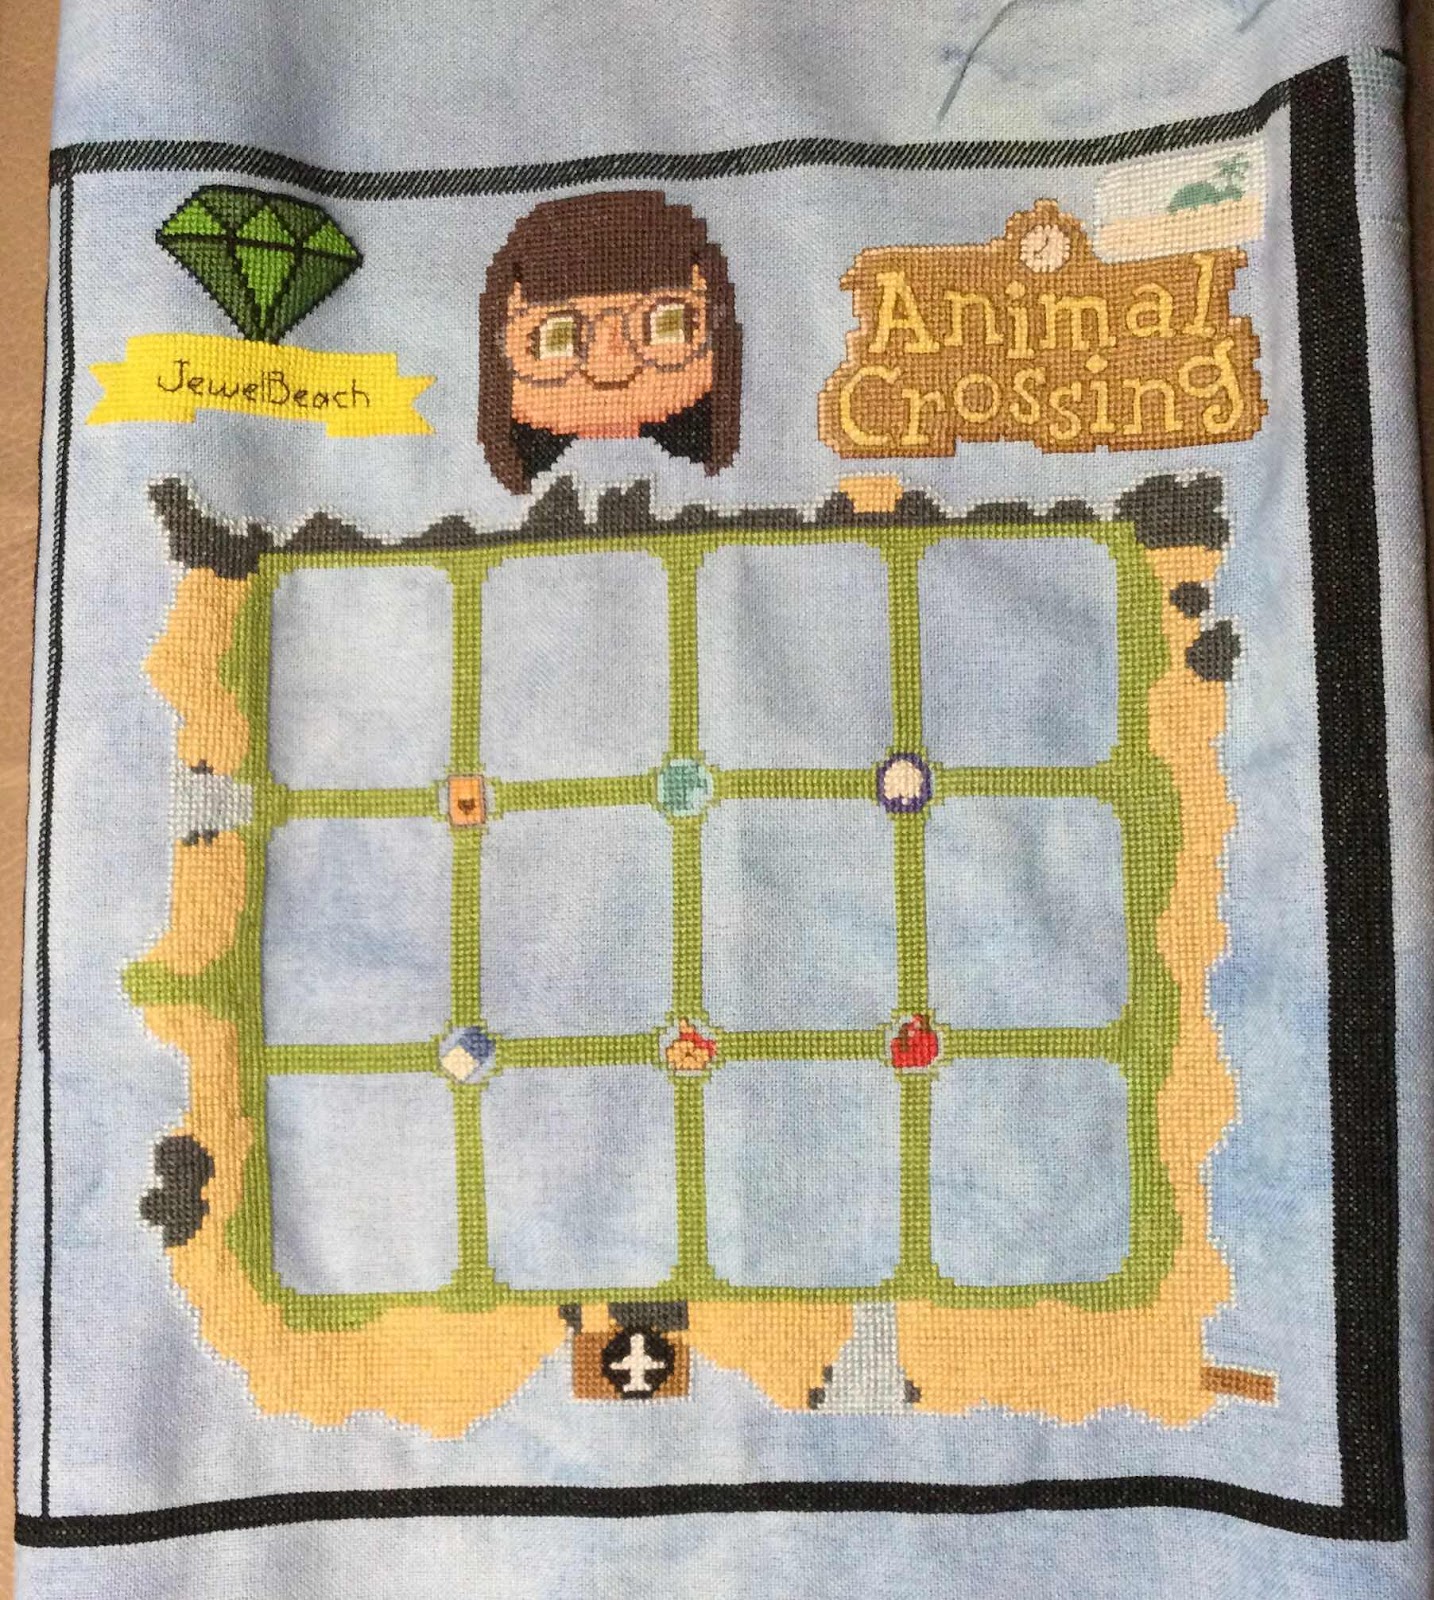
Sunday, 21 February 2021
Animal Crossing - Switch Frame - update #14
Last night I continued to work on the black edge of the switch screen.
I’m not sure what I was thinking when I designed the Switch frame. There is so much black, green and blue to fill in.
Saturday, 20 February 2021
1000 pc Puzzle
I haven’t stitched in a few days/nights, but have been designing cross stitch on my computer. Dave & I finished this Buffalo 1000 pc jigsaw puzzle yesterday. Today I played Animal Crossing New Horizons with my daughter-in-law Sarah. I hope to stitch tomorrow while doing laundry.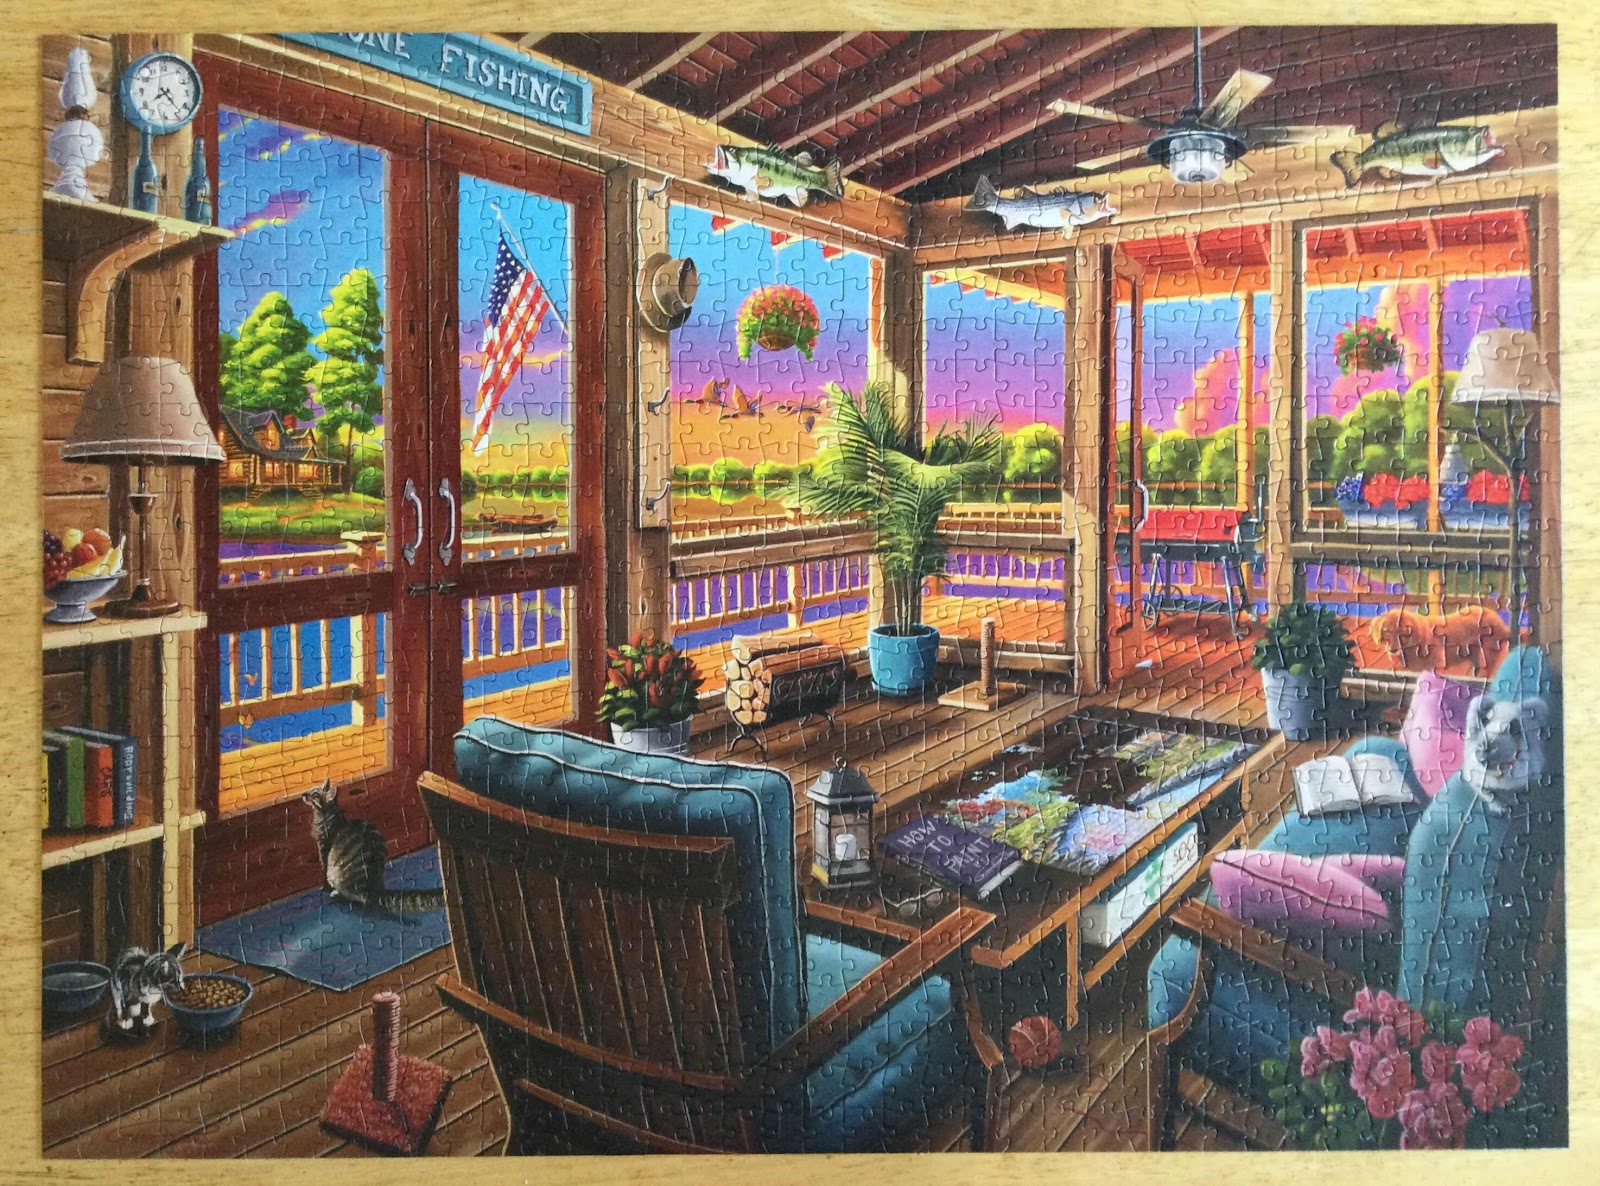
Thursday, 18 February 2021
Wednesday, 17 February 2021
Animal Crossing - switch frame - update #12
I’m still working on the black edge of the switch screen.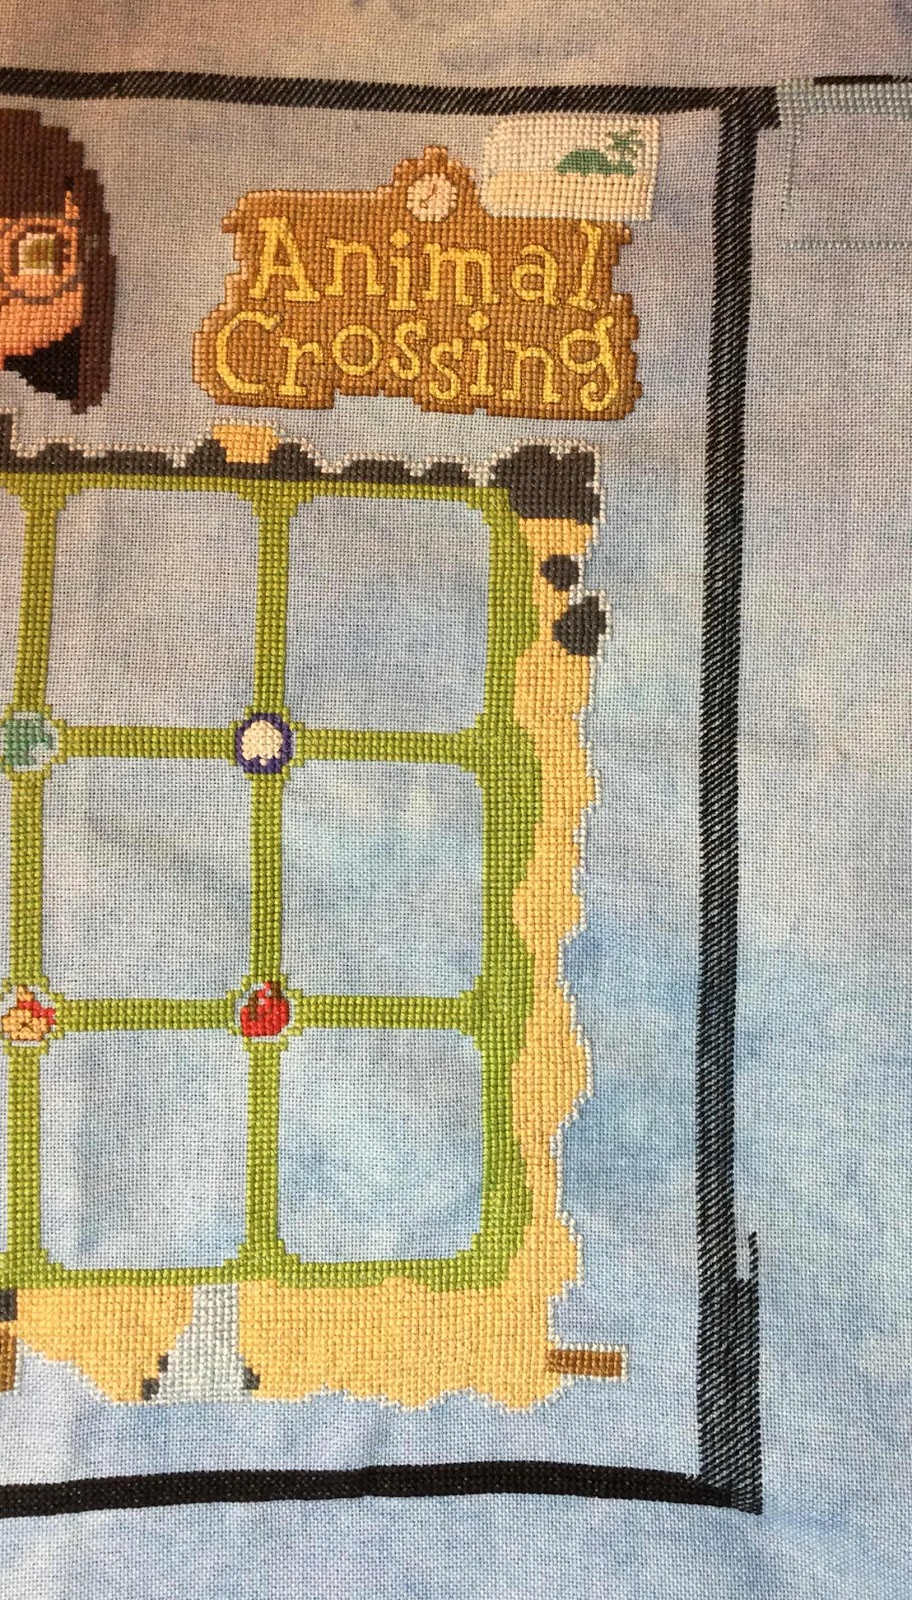
Tuesday, 16 February 2021
Animal Crossing - Switch Frame - update #11
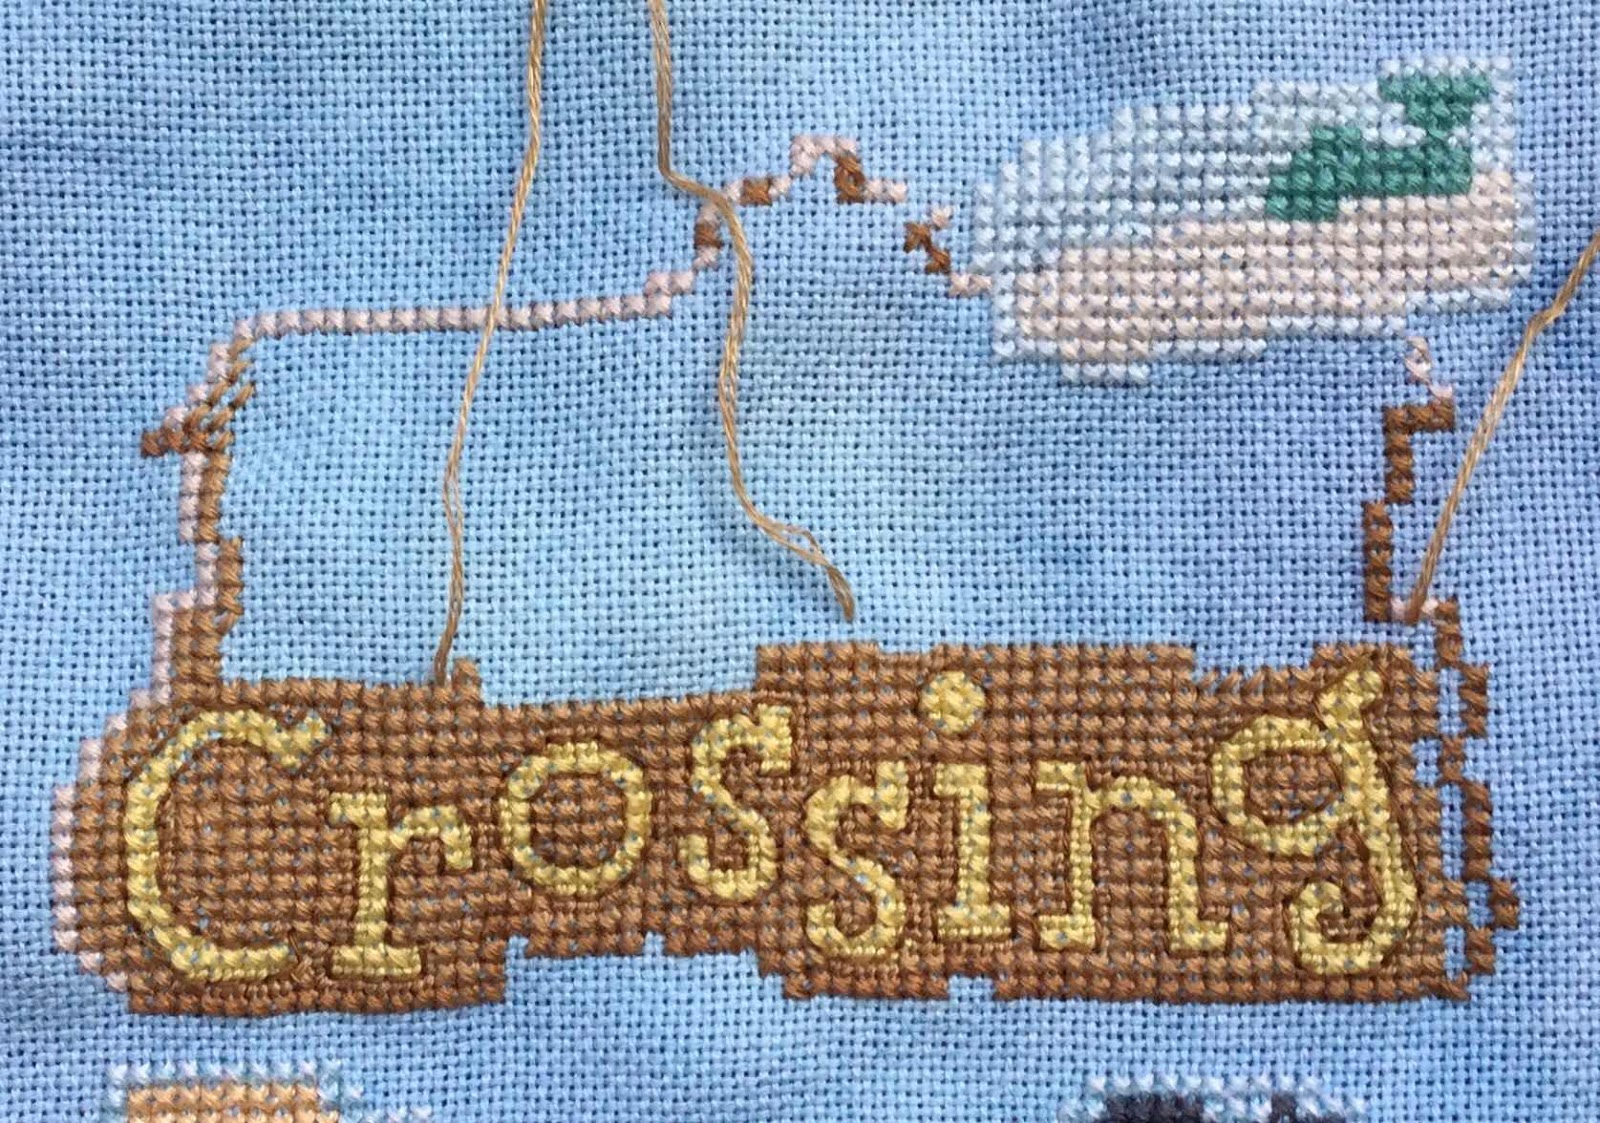
Well I thought I was doing great. Last night I had a lot done until I realized that I added the “+” black button on the blue joy con in the wrong place, so I had to frog the whole button and some of the blue where it sits beside the black edge. I forgot to take a photo before frogging. I forgot to finish the last 3 rows of black down the right side of the switch screen. I started stitching the blue in the black column area, then I added the + button too close to the edge of the screen. I think I need to finish stitching all of the black down the edge and top of the screen, so I don’t do this again. I also shouldn’t be stitching and watching TV when I need to focus on counting. :)
Here is the right side of the project so far.
Monday, 15 February 2021
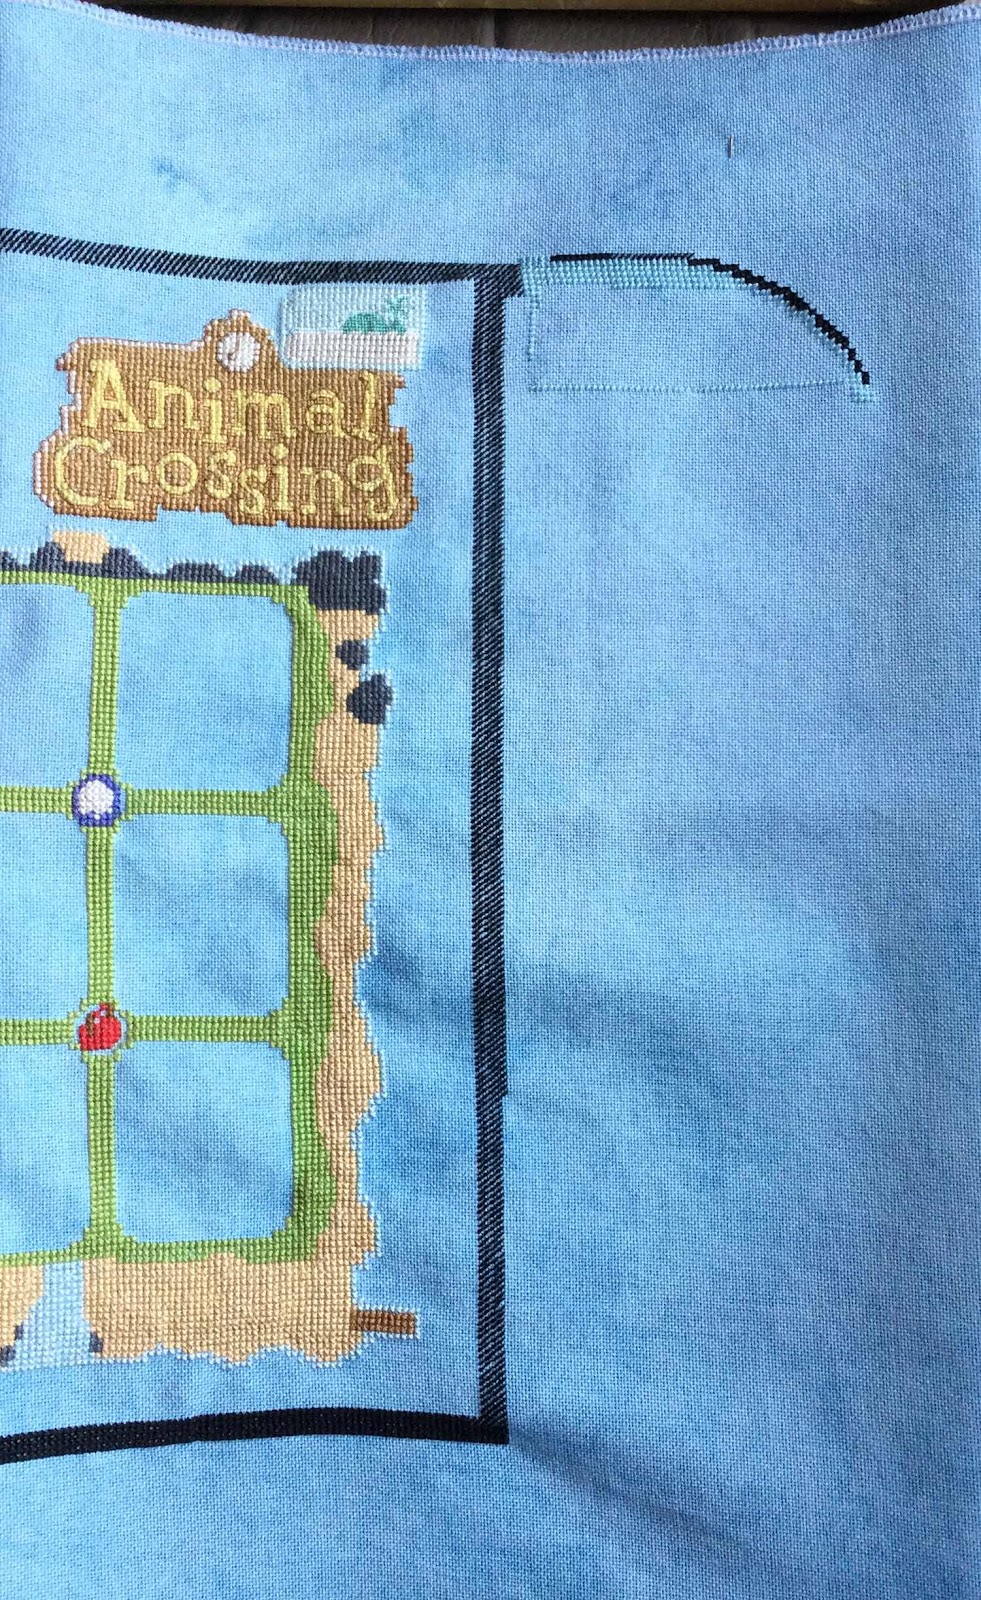
Animal Crossing - Switch Frame - update #10
Last night I stitched with more black, but also started the blue. I’m using DMC 3766 for the blue joy con controller.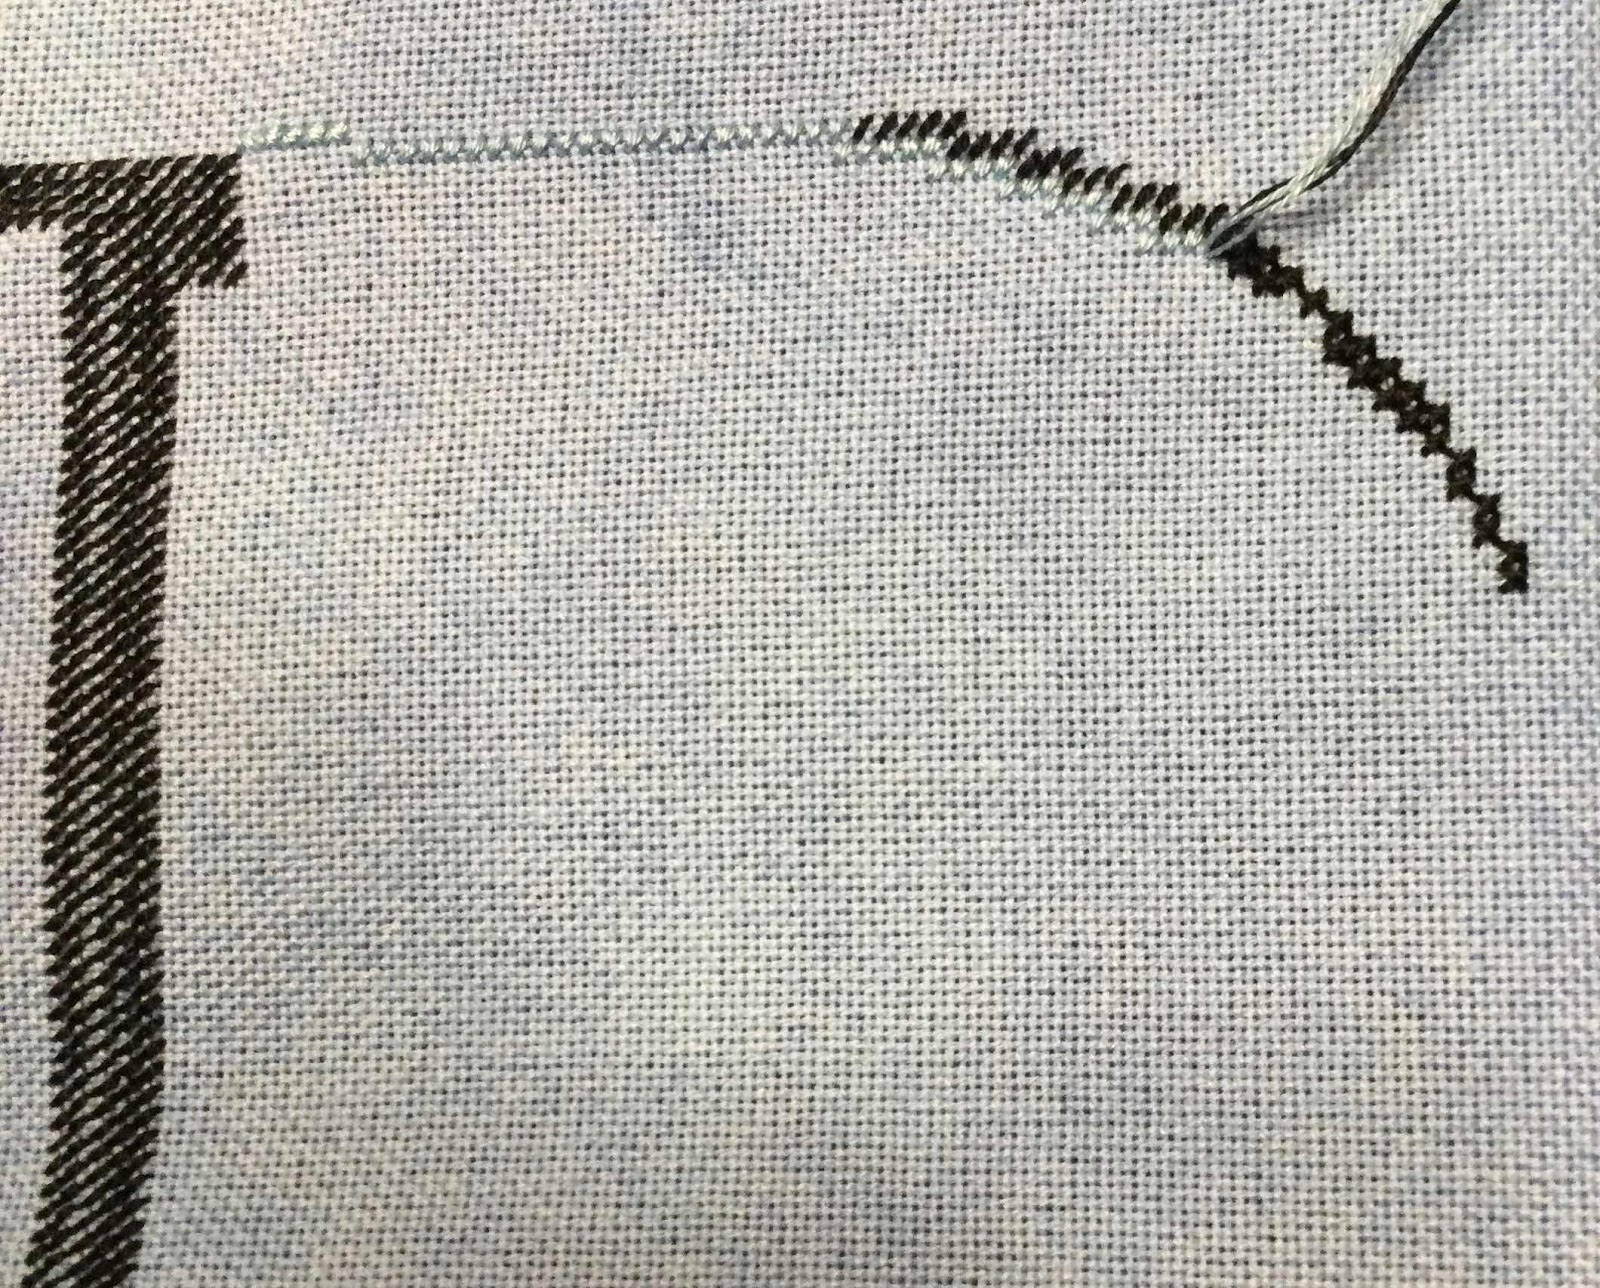
I have stitched the black outline all around the bottom and right side of the screen.
Sunday, 14 February 2021
Animal Crossing - Switch Frame - update #9
Last night I continued stitching with black.
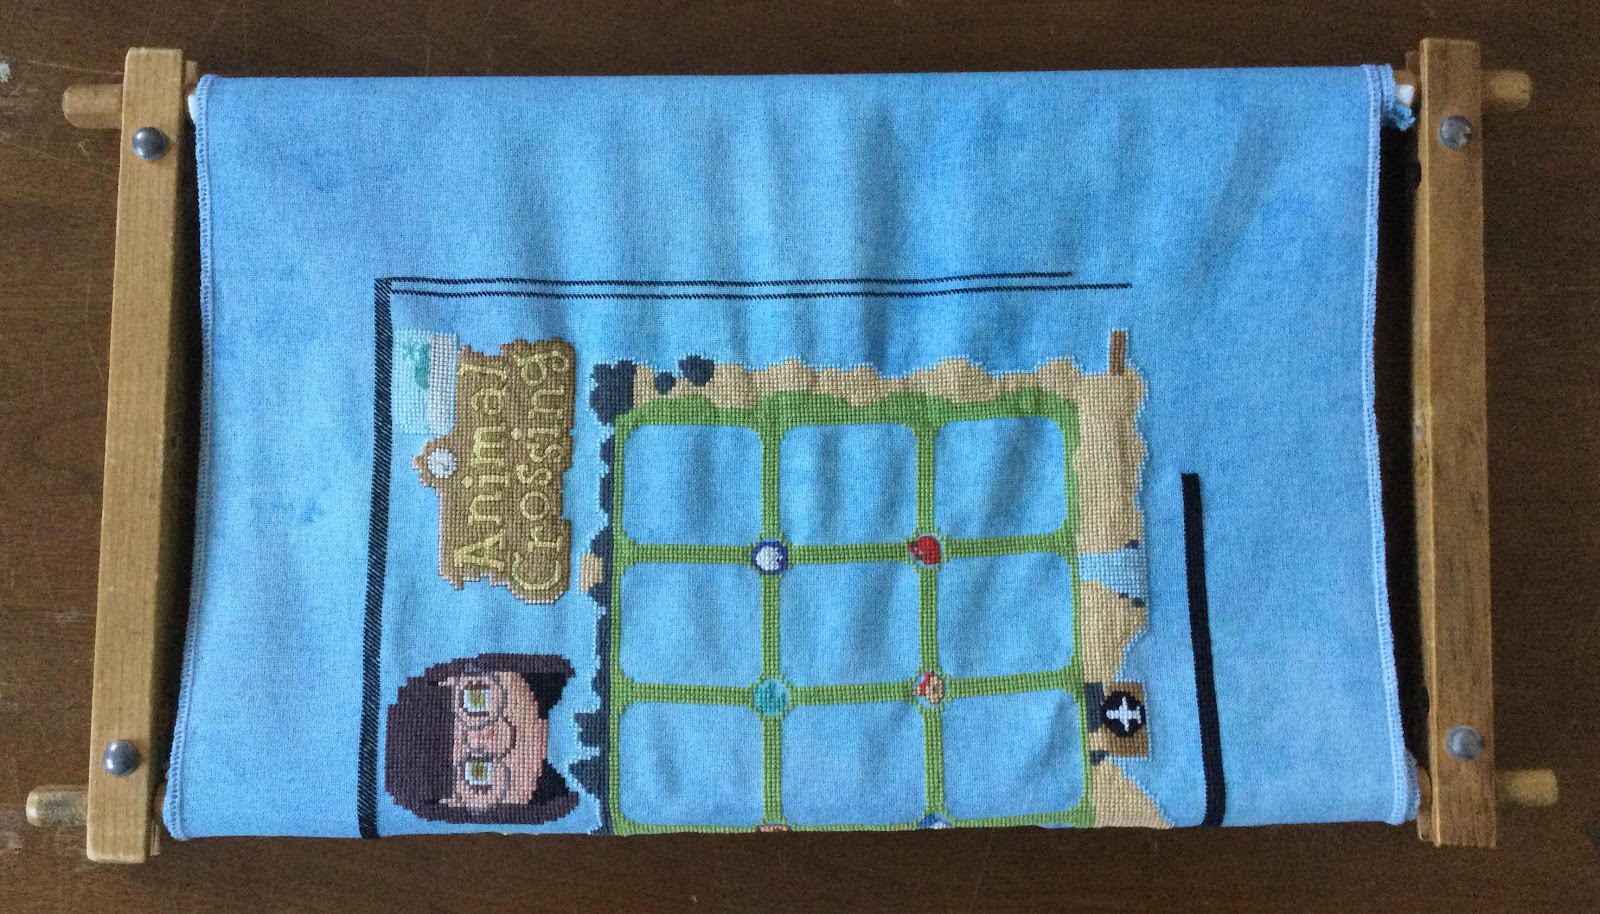
I attached the fabric to one of my scroll frames. This will make it slower to stitch because I had to attach it sideways, so I won’t be able to watch TV while stitching because I won’t be able to see above the scroll frame. I can attach the scroll frame to my standing frame, but then I cannot sit back (lounge) while stitching. I have gotten spoiled stitching in hand for the past few years which I actually prefer doing, even though it does make my hand sore sometimes.
Saturday, 13 February 2021
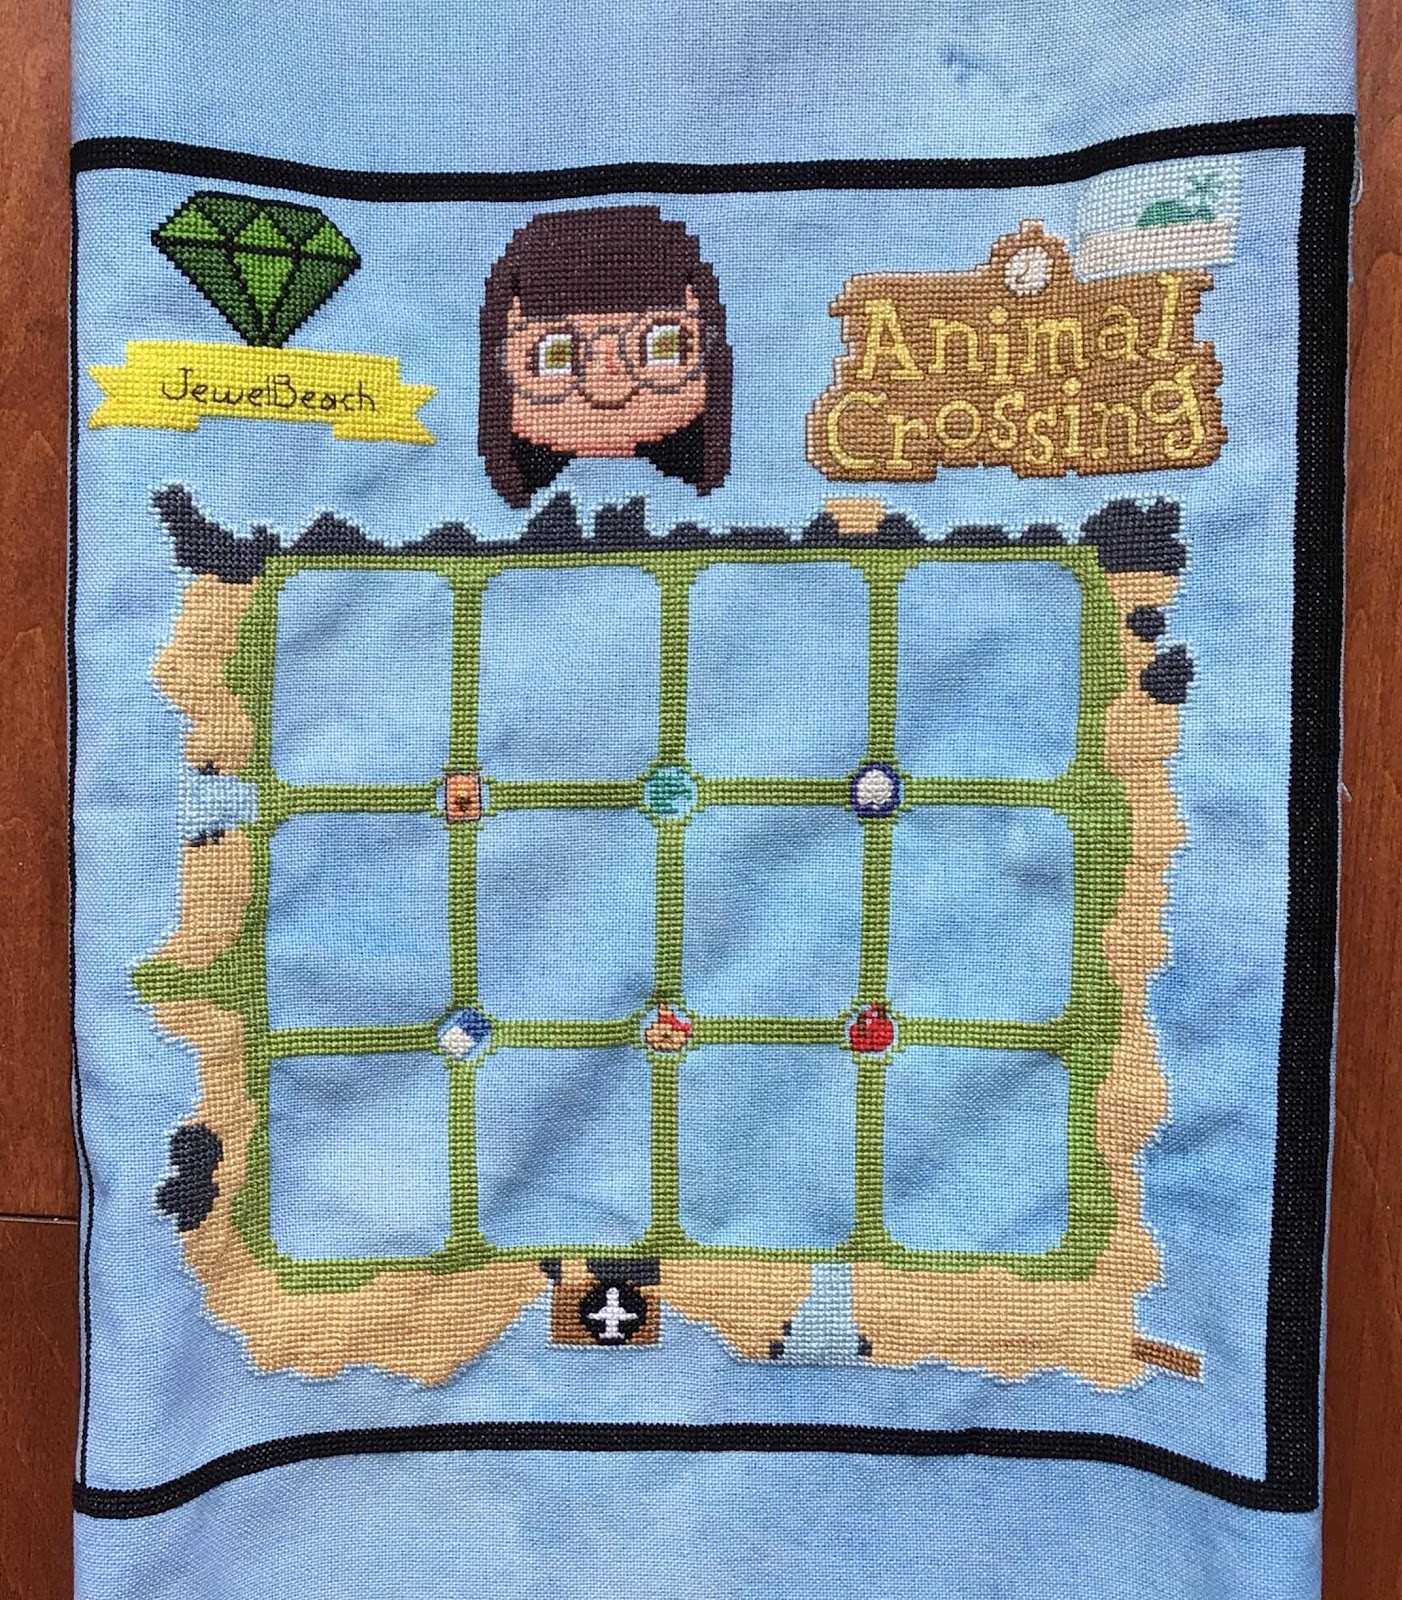
Animal Crossing - Gemstone - update #2
Last night I finished filling in the 2 green colours inside the gemstone, so now it is complete. 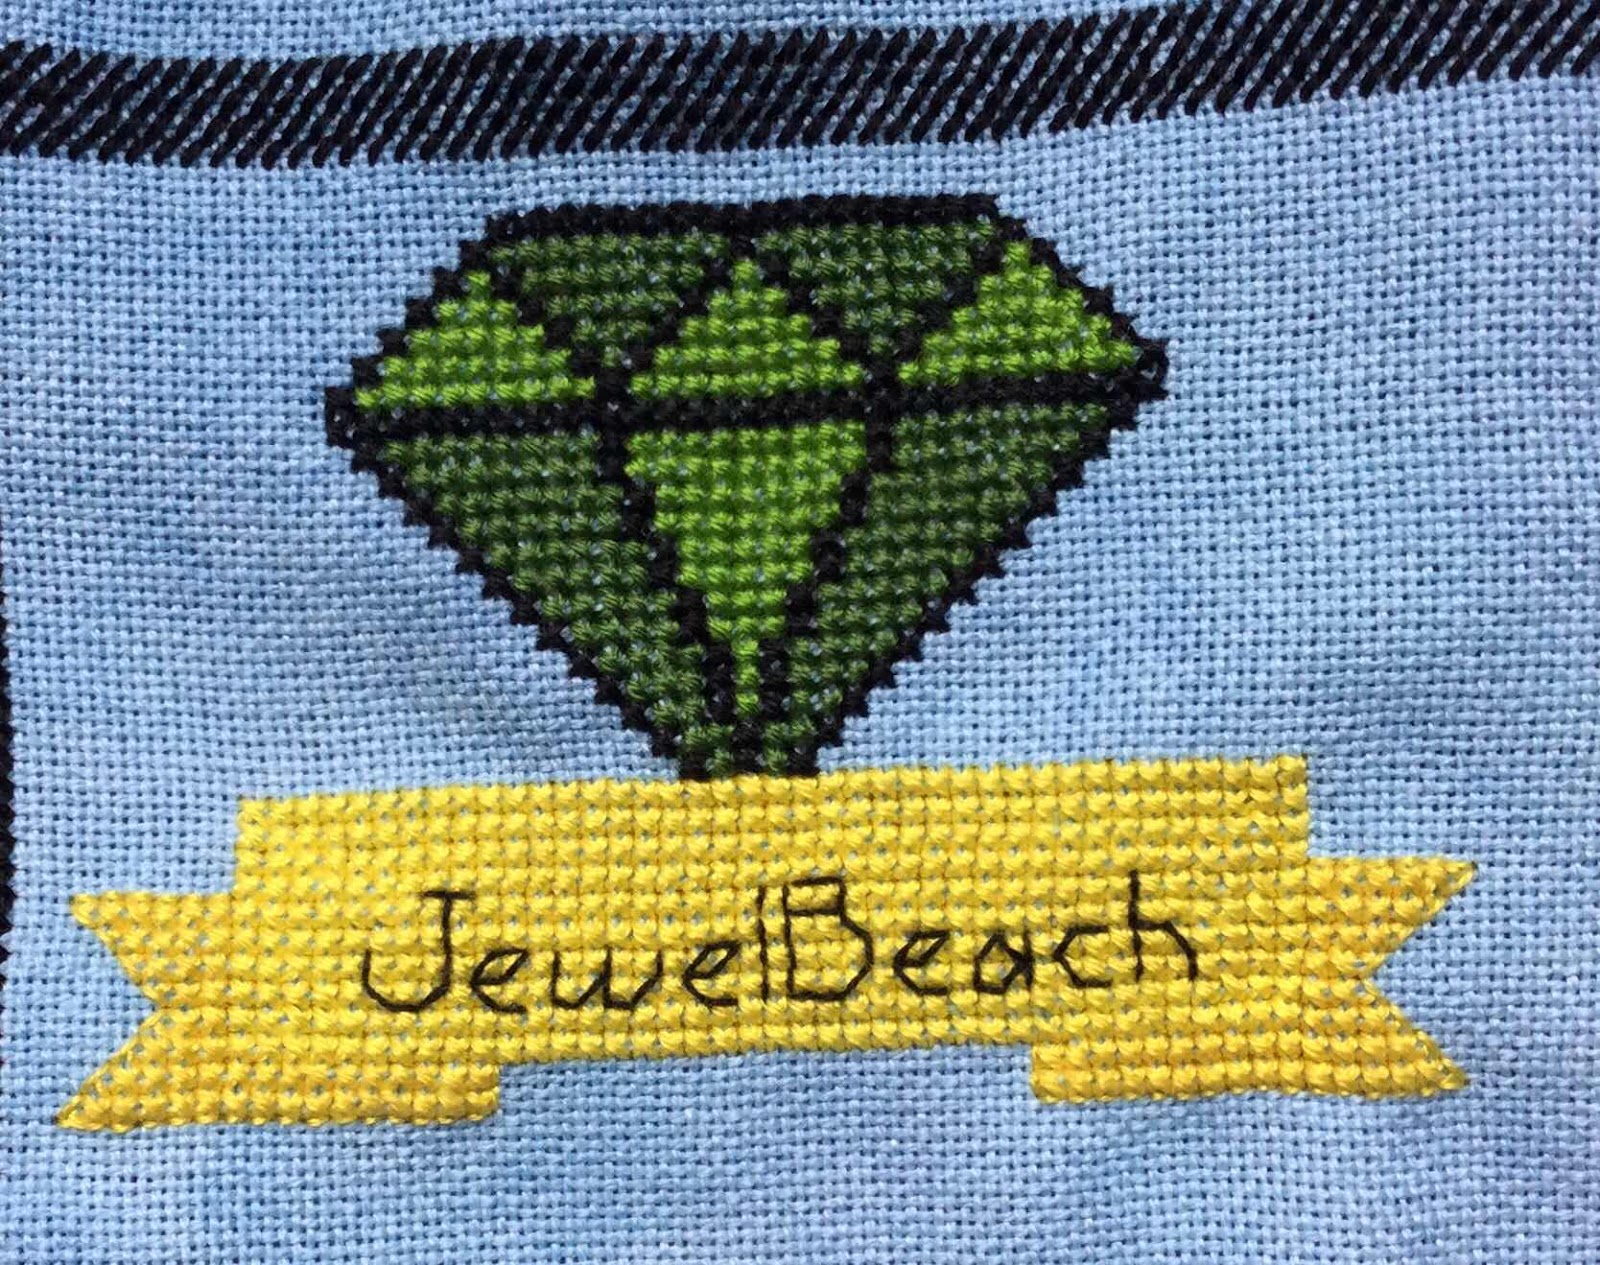
I still had time so I continued the black trim around the switch frame. I will continue working on the outlines of the black switch frame and blue joy con controller before starting the monthly characters. I have been stitching in hand, but I noticed that when I started filling in the green joy con it is stretching my fabric and making it buckle. I think I will move it to a scroll frame when I’m done with all of the outlines, so my filling in stitches will be straighter.
Friday, 12 February 2021
Animal Crossing - Gemstone - update #1
Last night I stitched the black outline of the gemstone. Tonight I will fill in the gemstone with two different shades of green.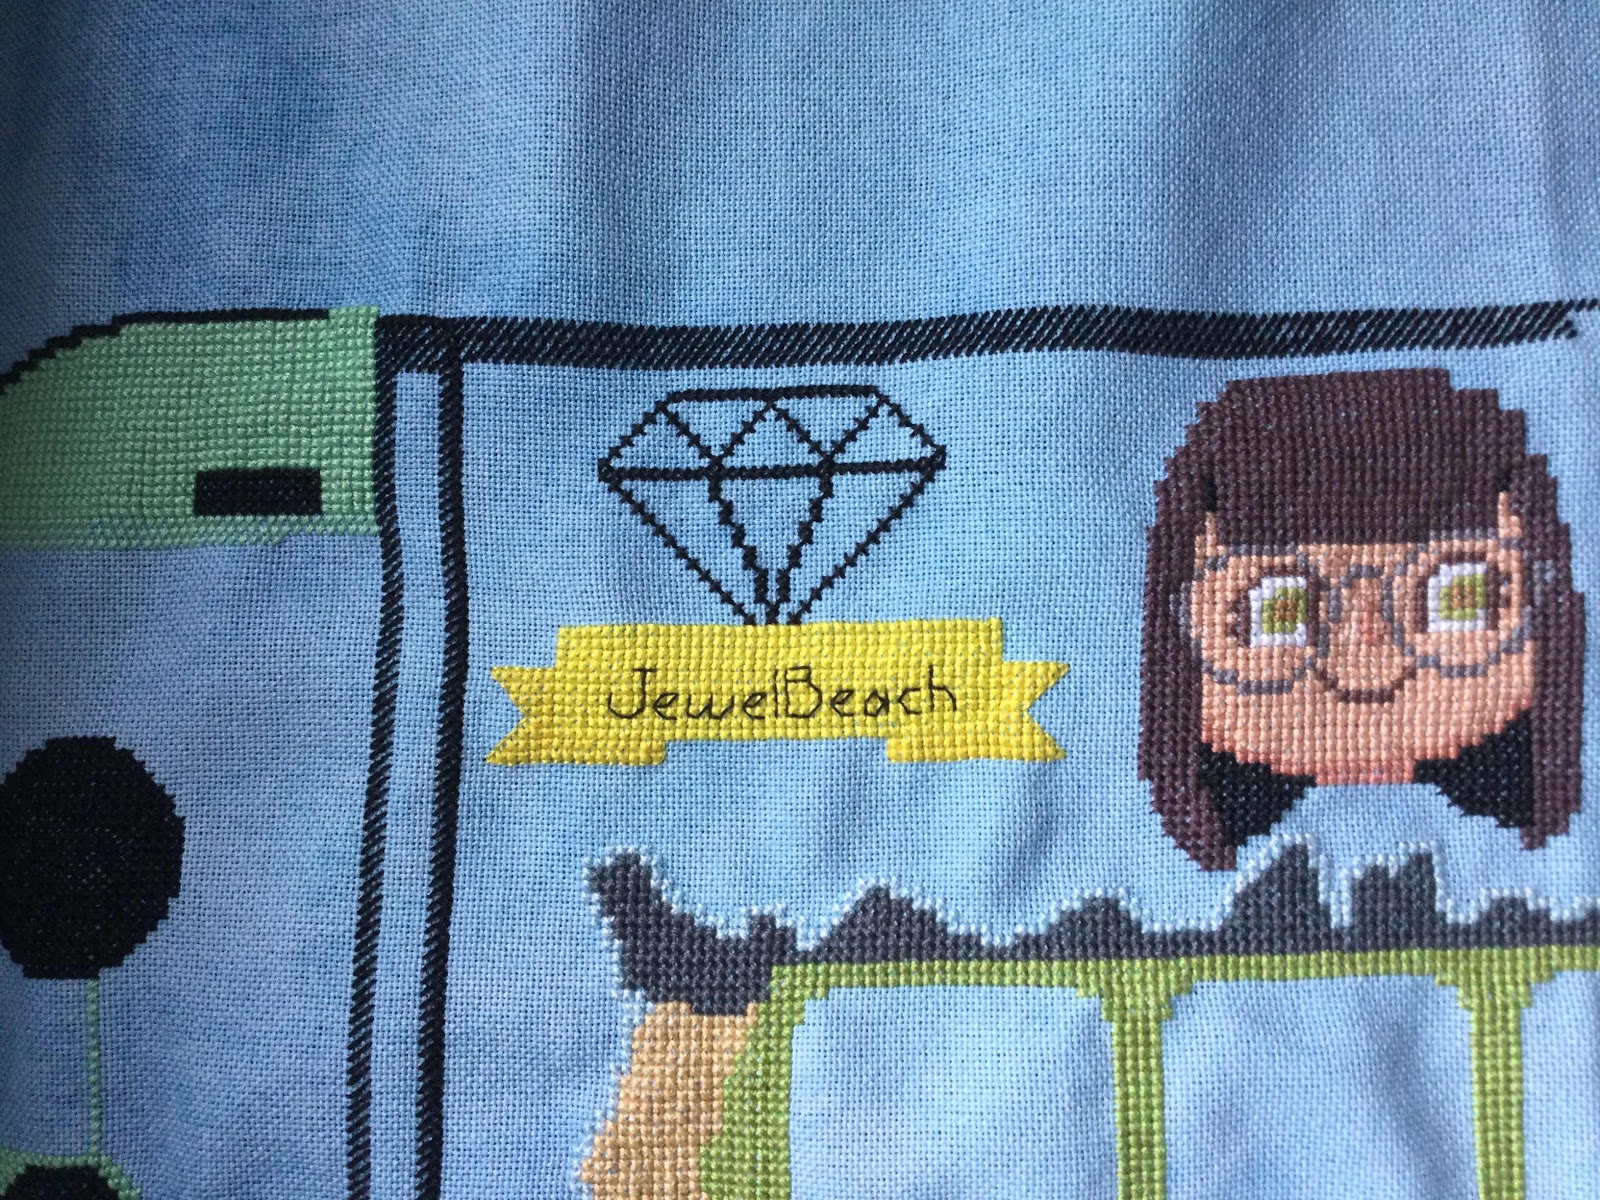
This is what my gemstone flag looks like in my game.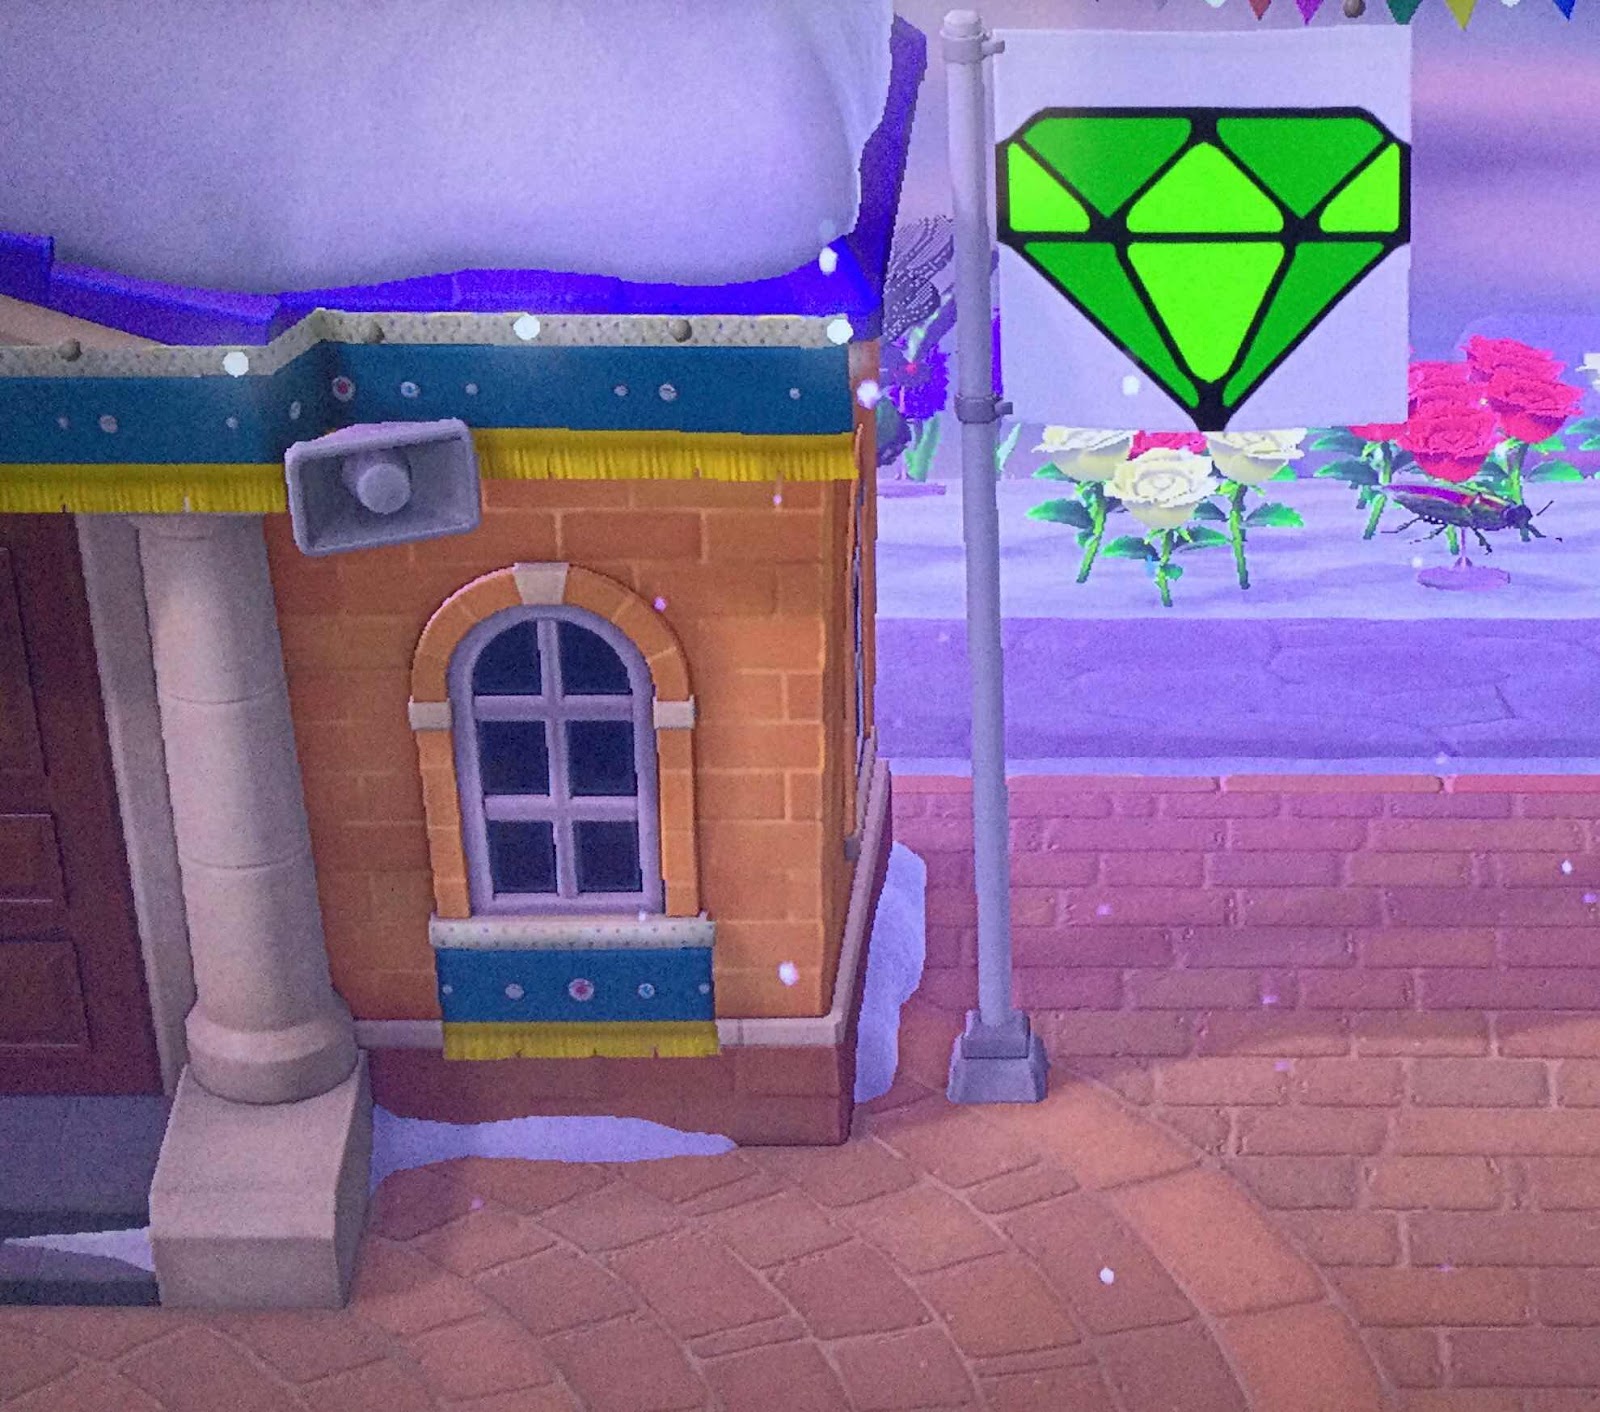
This is what my gemstone flag looks like in my game.
Thursday, 11 February 2021
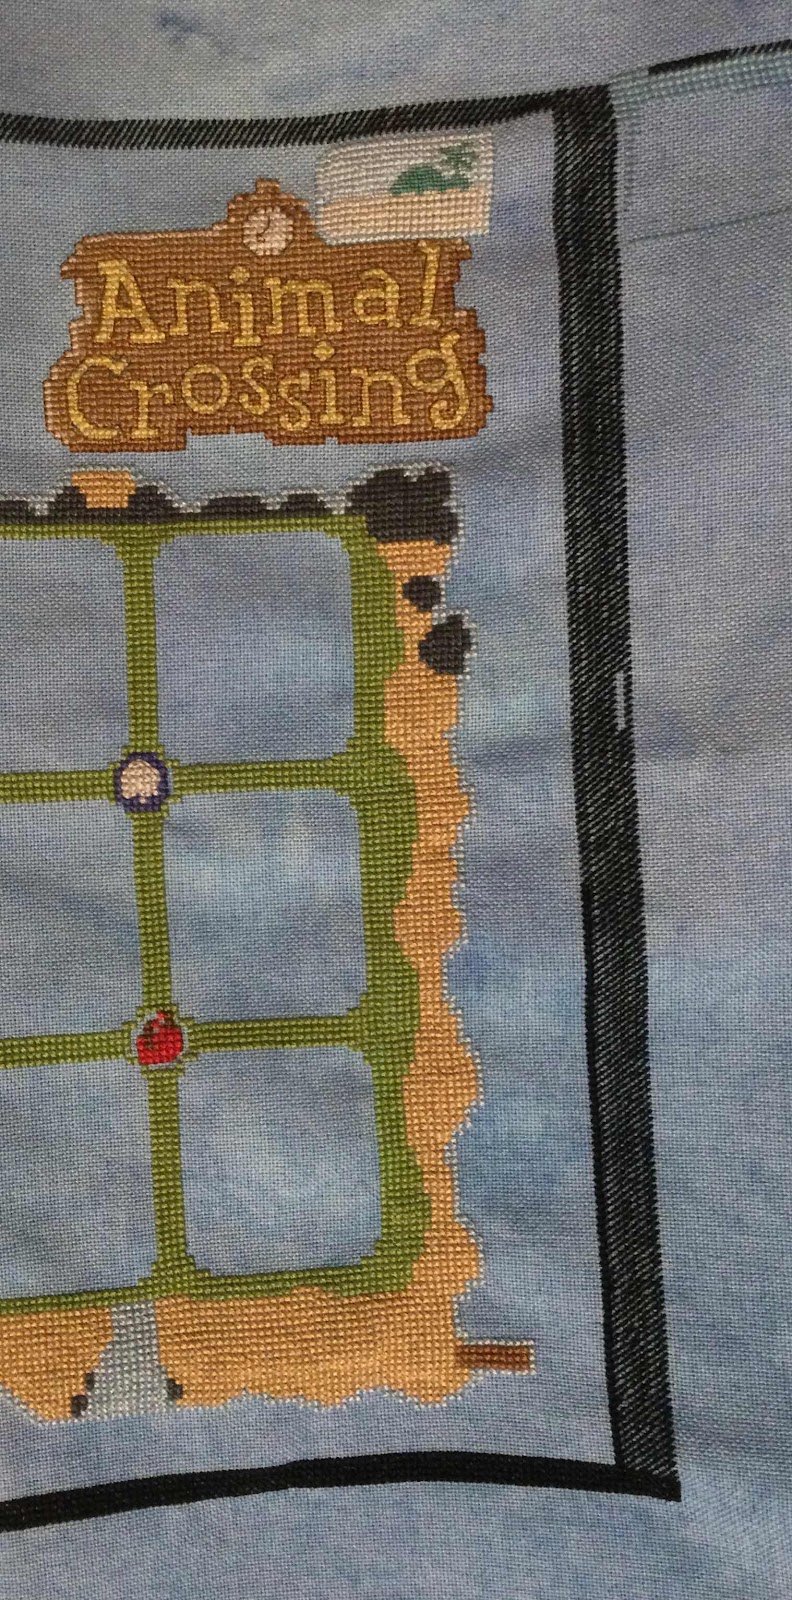
Animal Crossing - Animal Crossing Logo - update #12
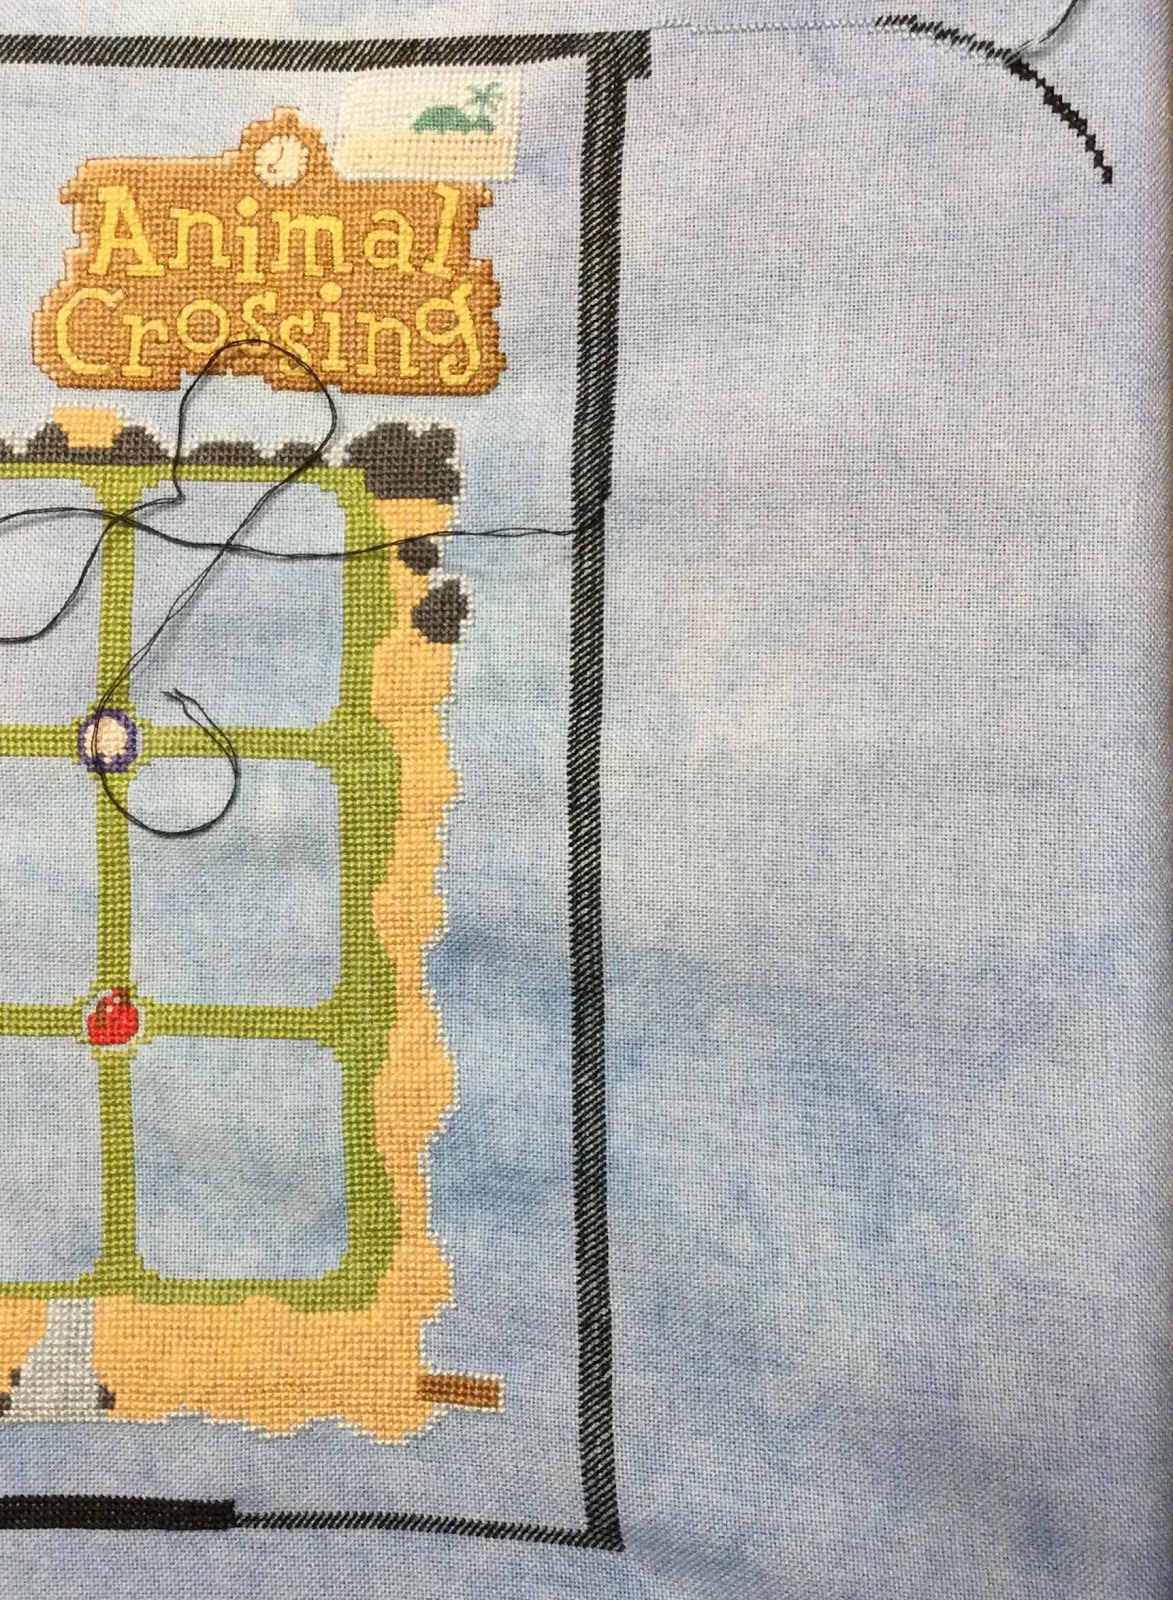
Last night I finally finished the Animal Crossing letters and then finished all of the stitching on the New Horizons tag. I only need to add the words New Horizons. 
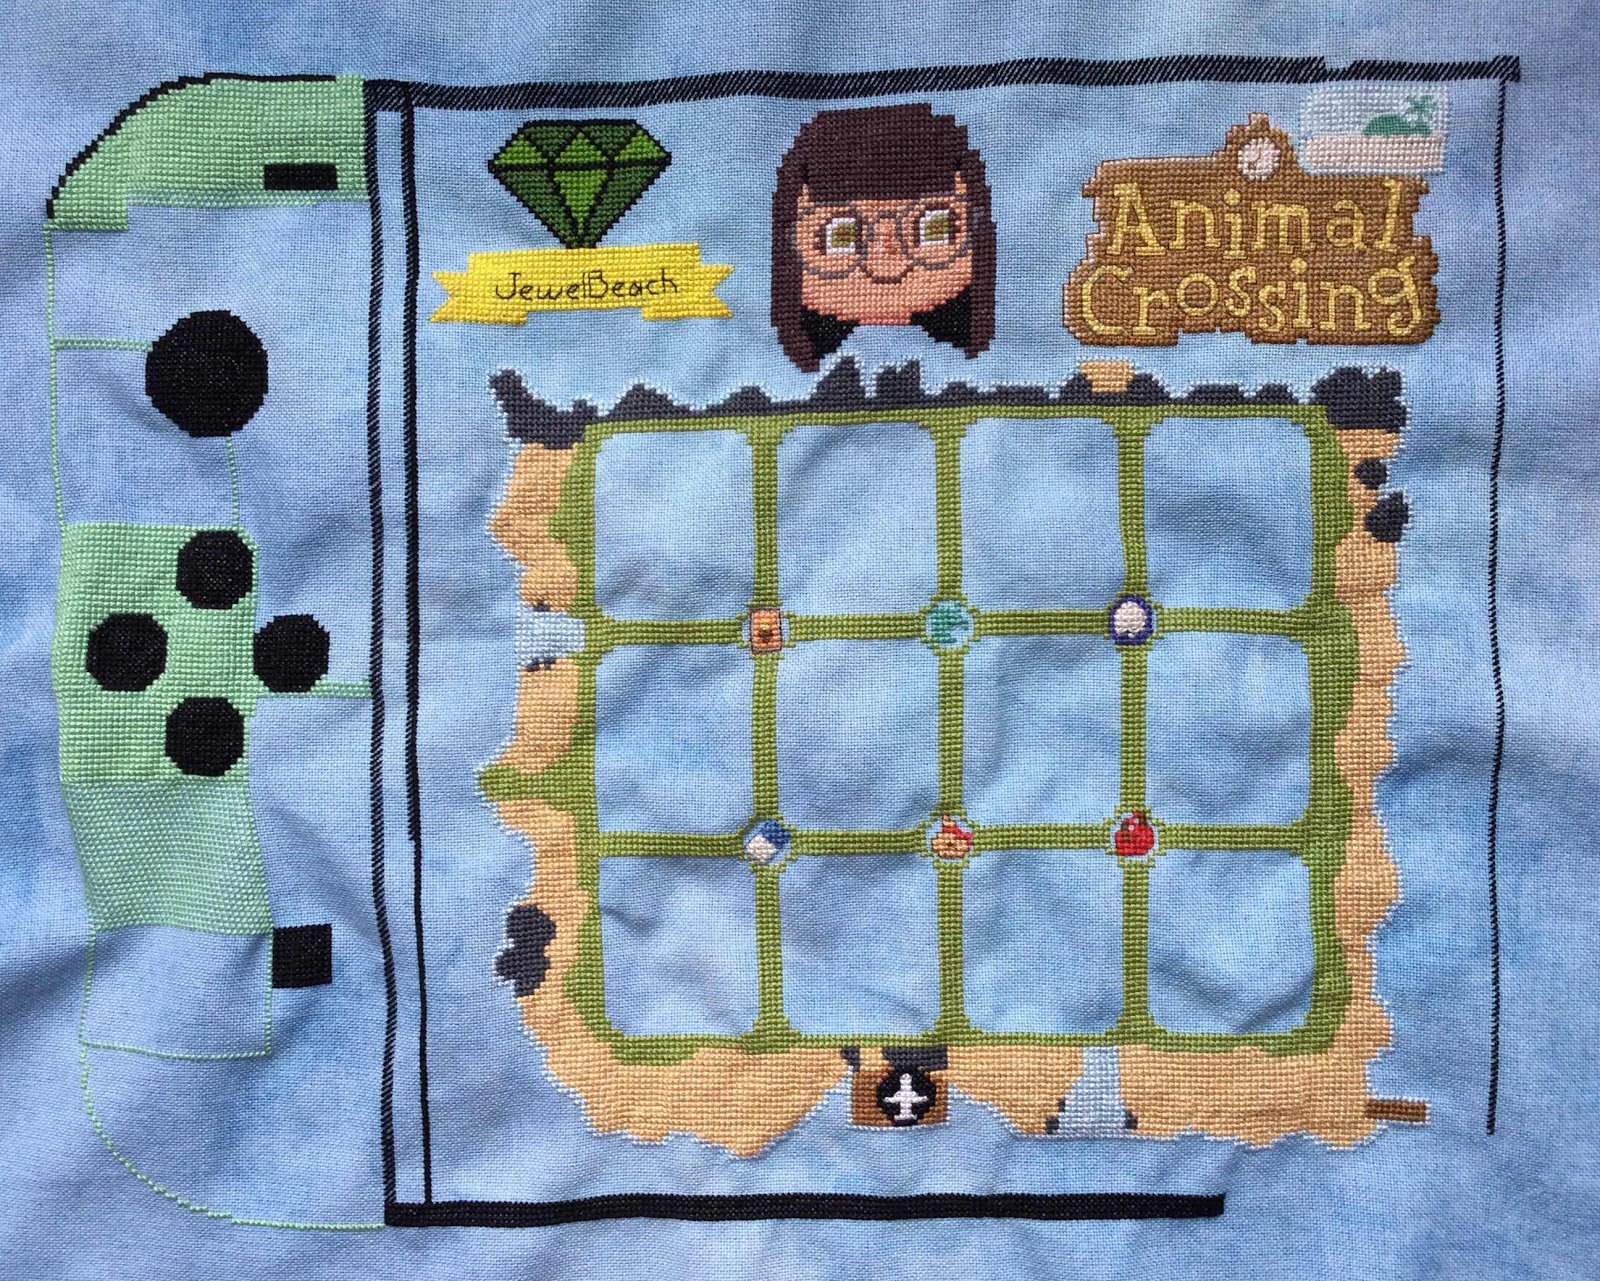
Here is what the whole project looks like so far. I noticed that the left side looks lopsided, so I am going to add a green gemstone. It is the same one I designed for my island’s flag. I’ll try and remember to take a photo of the flag next time I play my game.
Here is what the whole project looks like so far. I noticed that the left side looks lopsided, so I am going to add a green gemstone. It is the same one I designed for my island’s flag. I’ll try and remember to take a photo of the flag next time I play my game.
Wednesday, 10 February 2021
Animal Crossing - Animal Crossing Logo - update #11
I had to start stitching the New Horizons Tag because it is right above the letters. I can’t do the backstitching before the bottom row of the tag is done. Idecided since I had to frog the tag because I miscounted the Animal Crossing logo part, I might as well give the tag more detail like the brown sign. The tag is supposed to be on an angle, but I couldn’t get the backstitching lines around the outside and words correct, so I used my artistic licence and made the tag straight instead of on an angle. The island and palm tree will be stitched over 1 instead of over 2 like on the original design.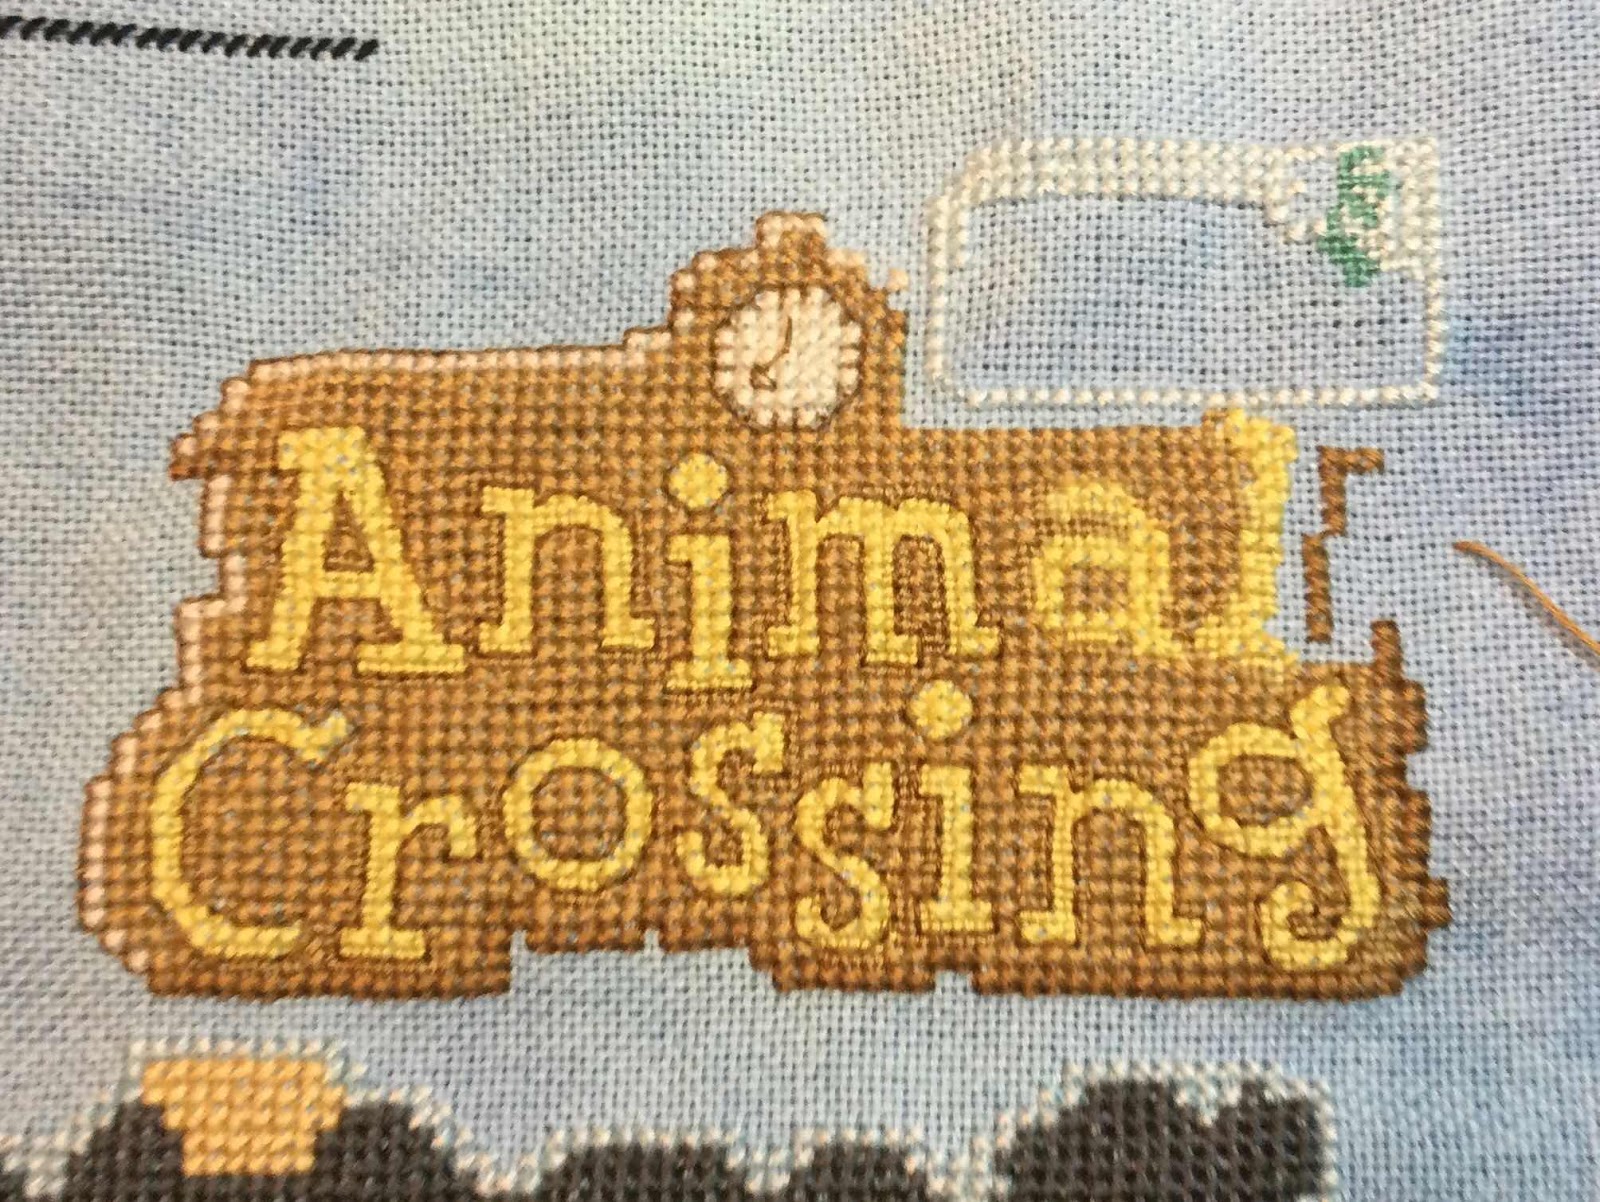

Tuesday, 9 February 2021
Animal Crossing - Animal Crossing Logo - update #10
I didn’t stitch very long last night. I filled in the brown between the letter “a” and “l” and then frogged the New Horizons tag at the top right. I hope to finish the letters tonight.
Monday, 8 February 2021
Animal Crossing - Animal Crossing Logo - update #9
Yesterday I stitched the yellow letters “a & l” and the brown around them. Tonight I can finish them with the backstitching..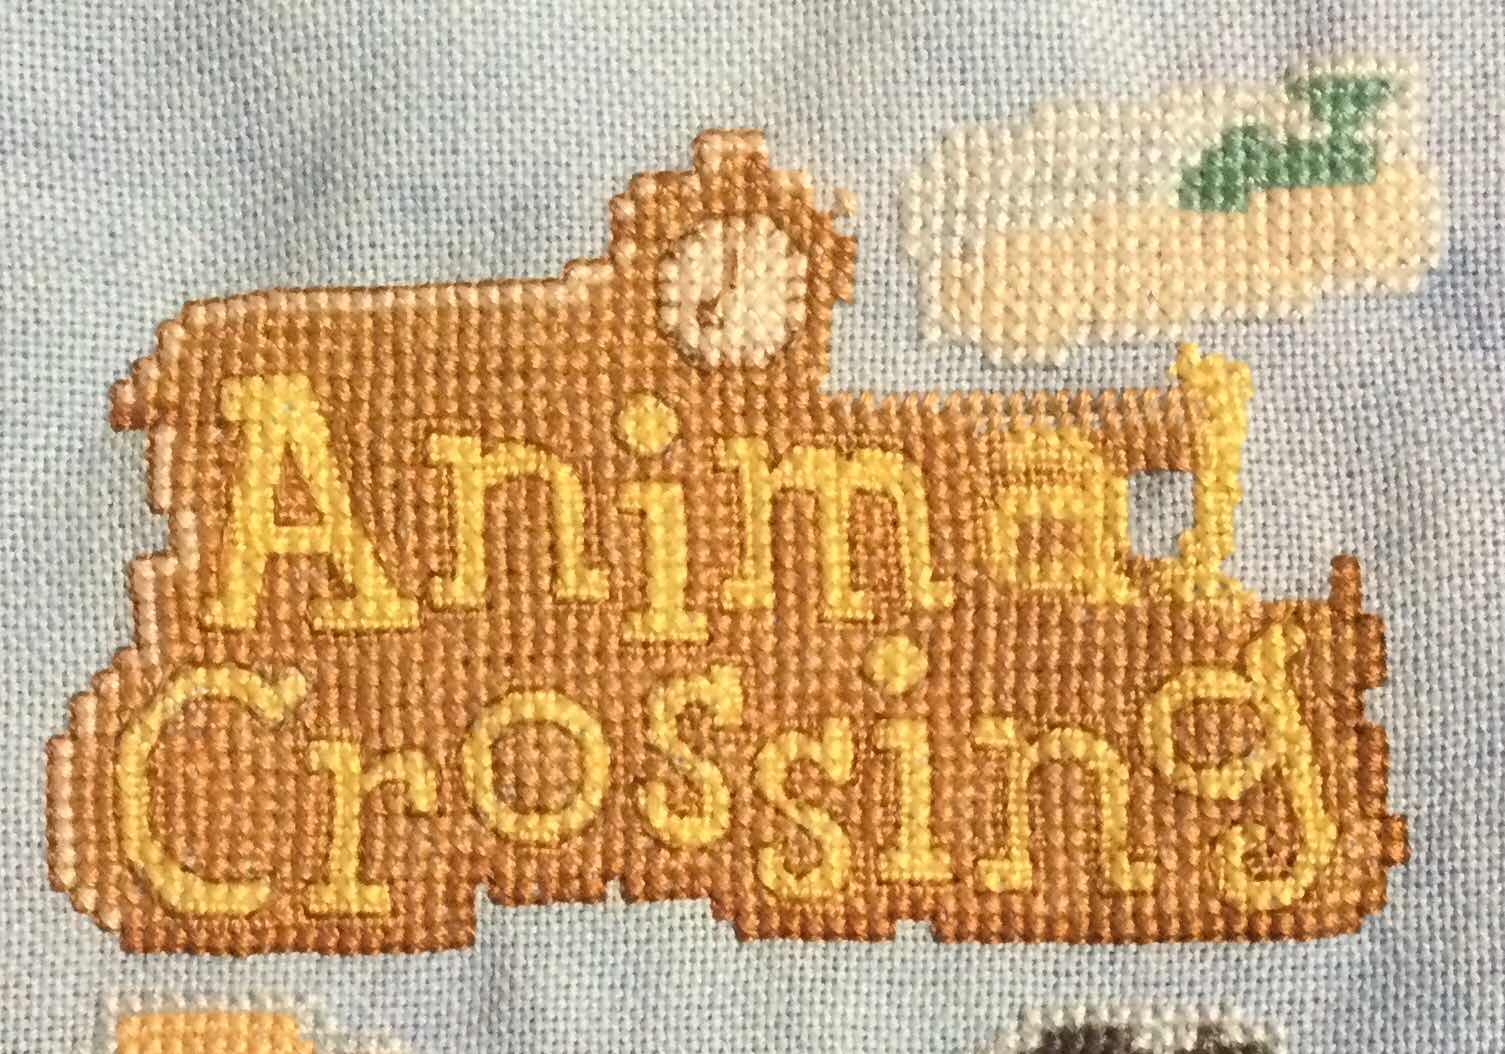
Sunday, 7 February 2021
Let The People Choose - Birds

I always forget to do this SAL on the first Saturday of each month. I only remember when I start seeing everyone else do their blog post.
Thank you Jo at Serendipitous Stitching for hosting this SAL each month.
Next month's theme is Spring.
I didn’t think I had stitched that many bird projects until I went through my list of finished projects. I actually have 18 projects with a bird in them. I won't show them all because you have seen some recently. I will list them all but only show some of them in photos.
Garden Goose stitched way back in 1997 and I have never shown a photo before. My mother-in-law had dishes with geese on them and she was collecting geese figurines for awhile, so I stitched this for her.

Red Tailed Hawk was stitched in 2001 for my oldest son Jaspar. It still hangs in his bedroom (in our house).

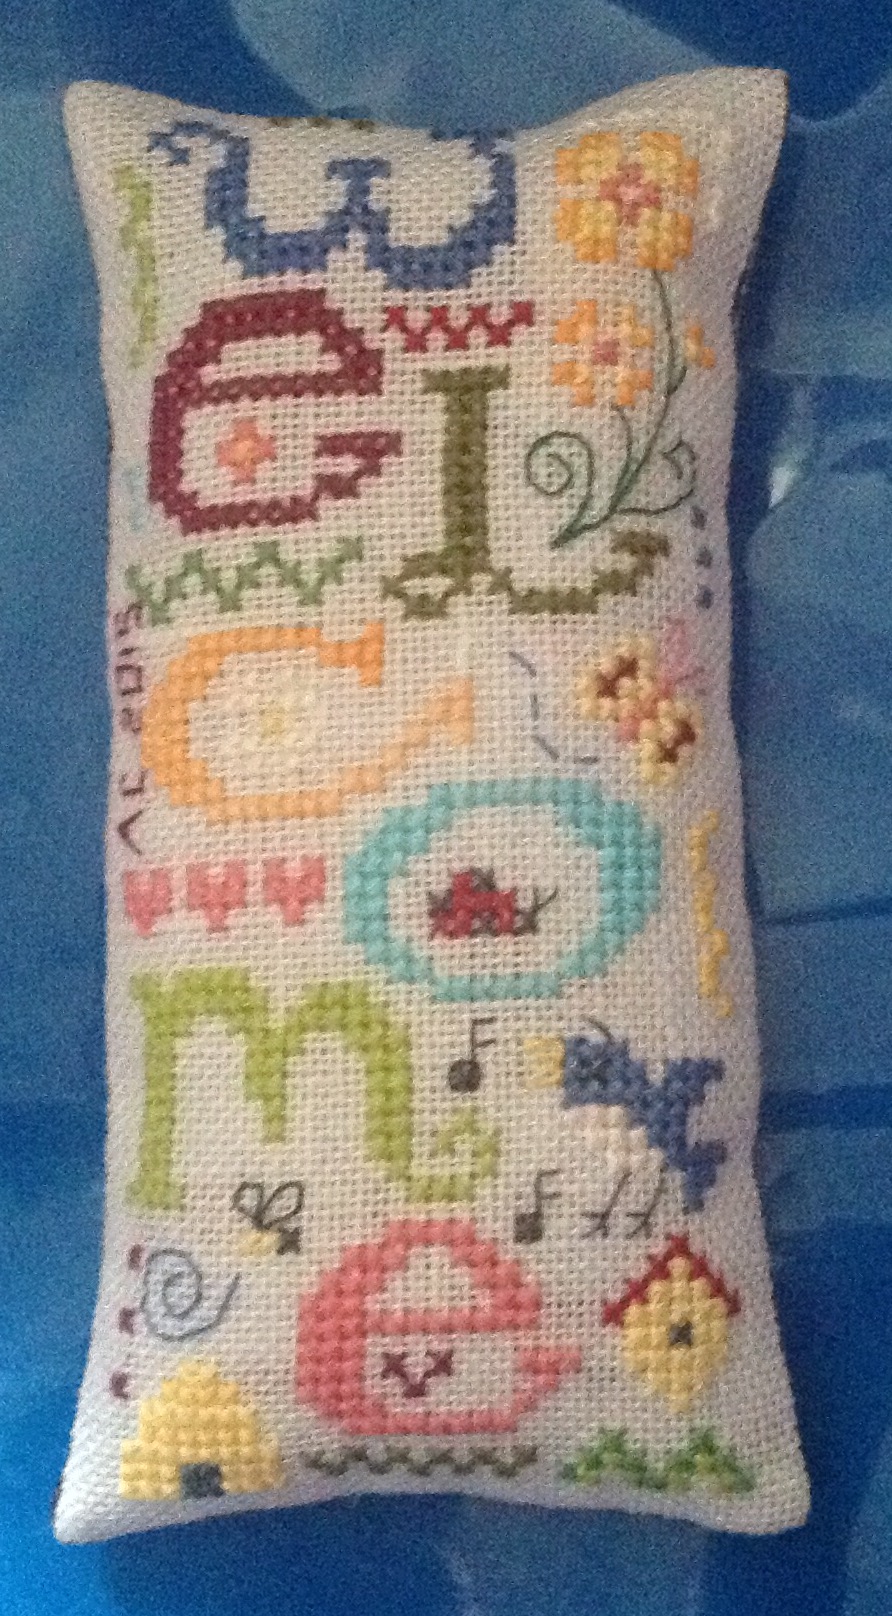
Backyard Birds Pillow was stitched in 2005 for my sister-in-law Olivette. She likes birds and nature. I made it into a pillow for her.

Four Seasons Birds which I stitched in 2011 for my husband Dave. It hangs in our upstairs hallway.

Hummingbird Biscornu was also stitched in 2011. I just loved the colours.

Rainbow Bridge was also stitched in 2011 for myself. It is a tribute to all of our pets. I added a few budgies to the project because Dave & I had 5 before we had children.

In 2015 I participated in a Summer Exchange. I made this Welcome Pillow which has a blue bird on it.
Other projects you have already seen on my blog.
I stitched the Green Flip-its, which has a bird in the part called Keep Our Air Clean.
I have stitched the following Just Nan 3D miniature birds and owls which you have seen photos before.
Birds
Cardinal Tweet (x2) & Blue Jay
Bluebird Tweet & Rosebud Tweet
Owls
Oakley Owl & Little Princess Snow
Let The People Choose - Fire I showed everyone the Dragon Dreams phoenix ornament, and the beautiful phoenix from Not Forgotten which I used on the SYOA Harry Potter project.
I am off to see what others have stitched for the bird theme.
Saturday, 6 February 2021
Animal Crossing - Animal Crossing Logo - update #8
This morning I completed the clock, fixed most of the border and started to back stitch around the logo. I will leave the brown for now and finish the yellow letters.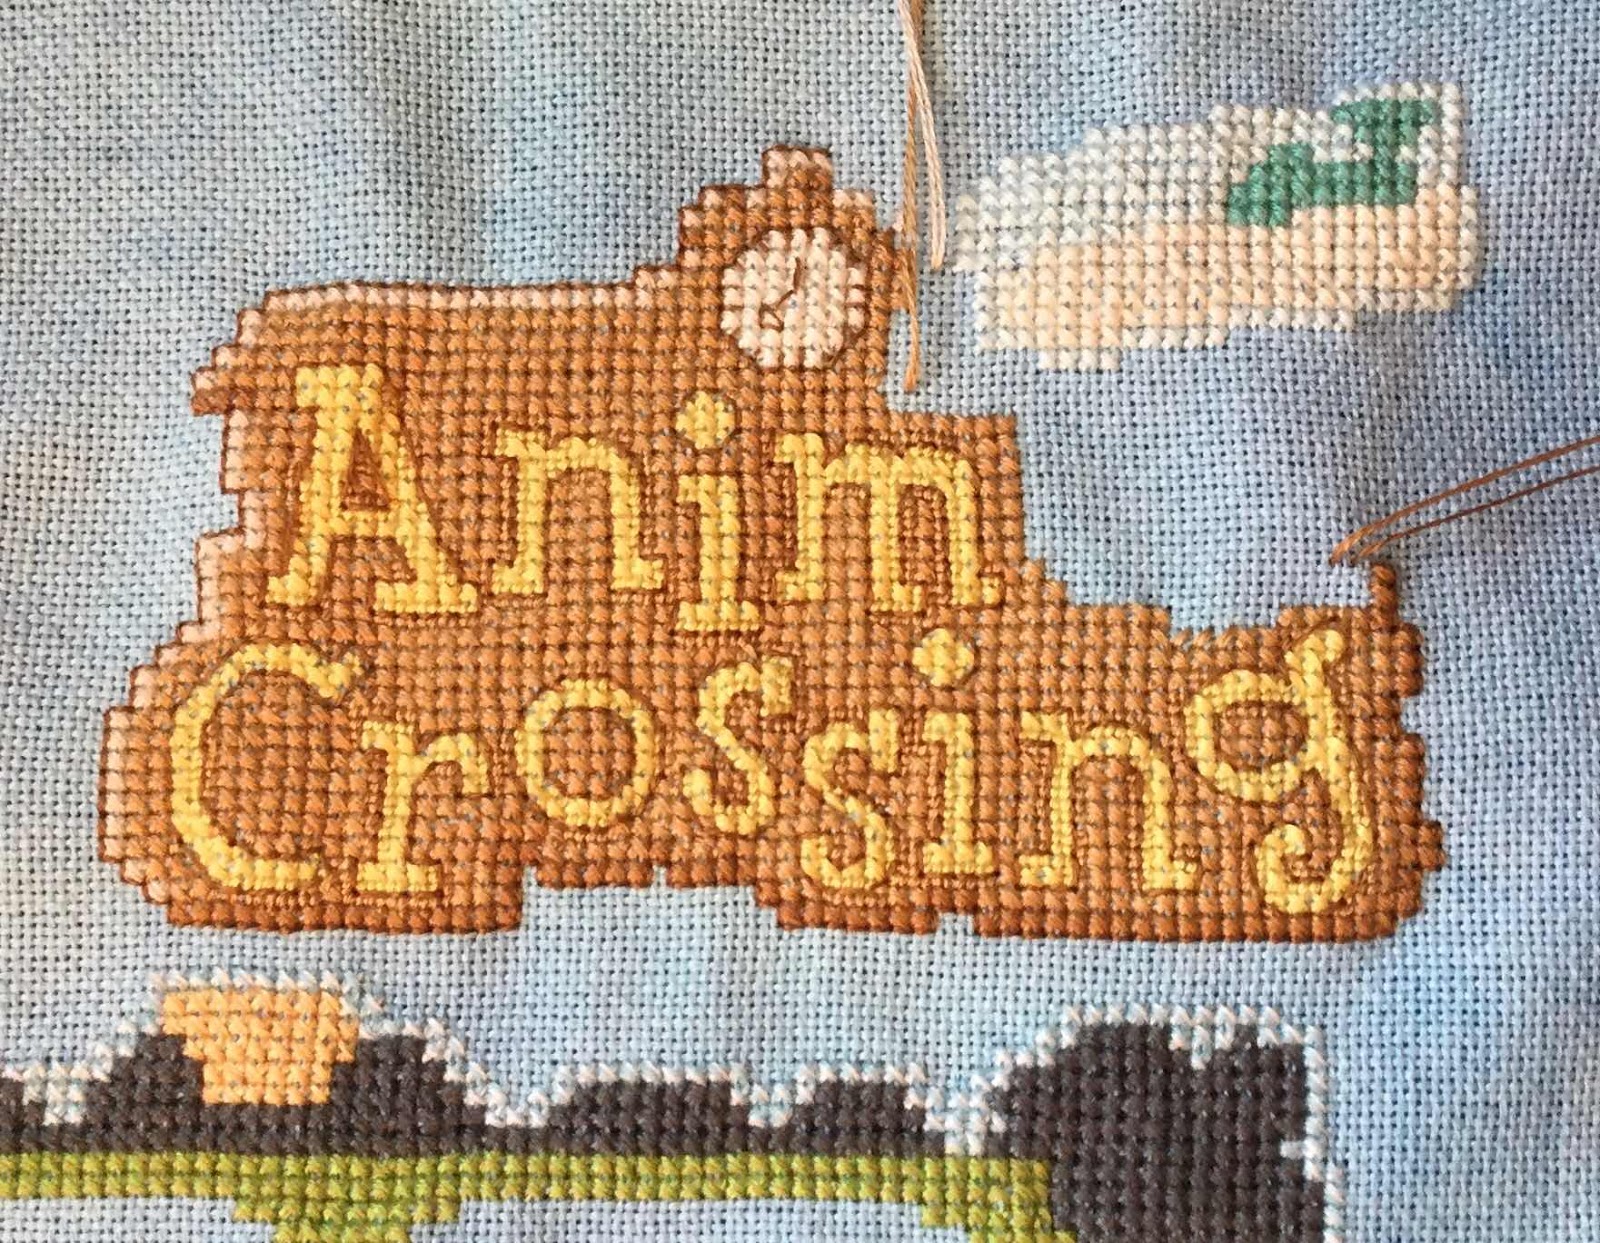
Friday, 5 February 2021
Animal Crossing - Animal Crossing Logo - update #7
Last night I made great progress on the letters and found my mistake. After stitching the yellow in the letter “i” in Animal I discovered that the brown didn’t line up with the side of the clock above. As you can see I had to frog the light beige (543) outline at the top and move it over to the left one space. That is why I’m off by one space on the right side of the logo. This also means that I really should be moving the tag at the top. I’ve be thinking of frogging it anyway and recharting it to have more detail now that the Animal Crossing letters are all backstitched. The tag should have straight edges around it. I think I will finish moving the brown border around the logo and backstitch it and fill in the clock before finishing the last 2 letters. I will also frog the tag. I’ll wait to restitch the tag after doing everything else.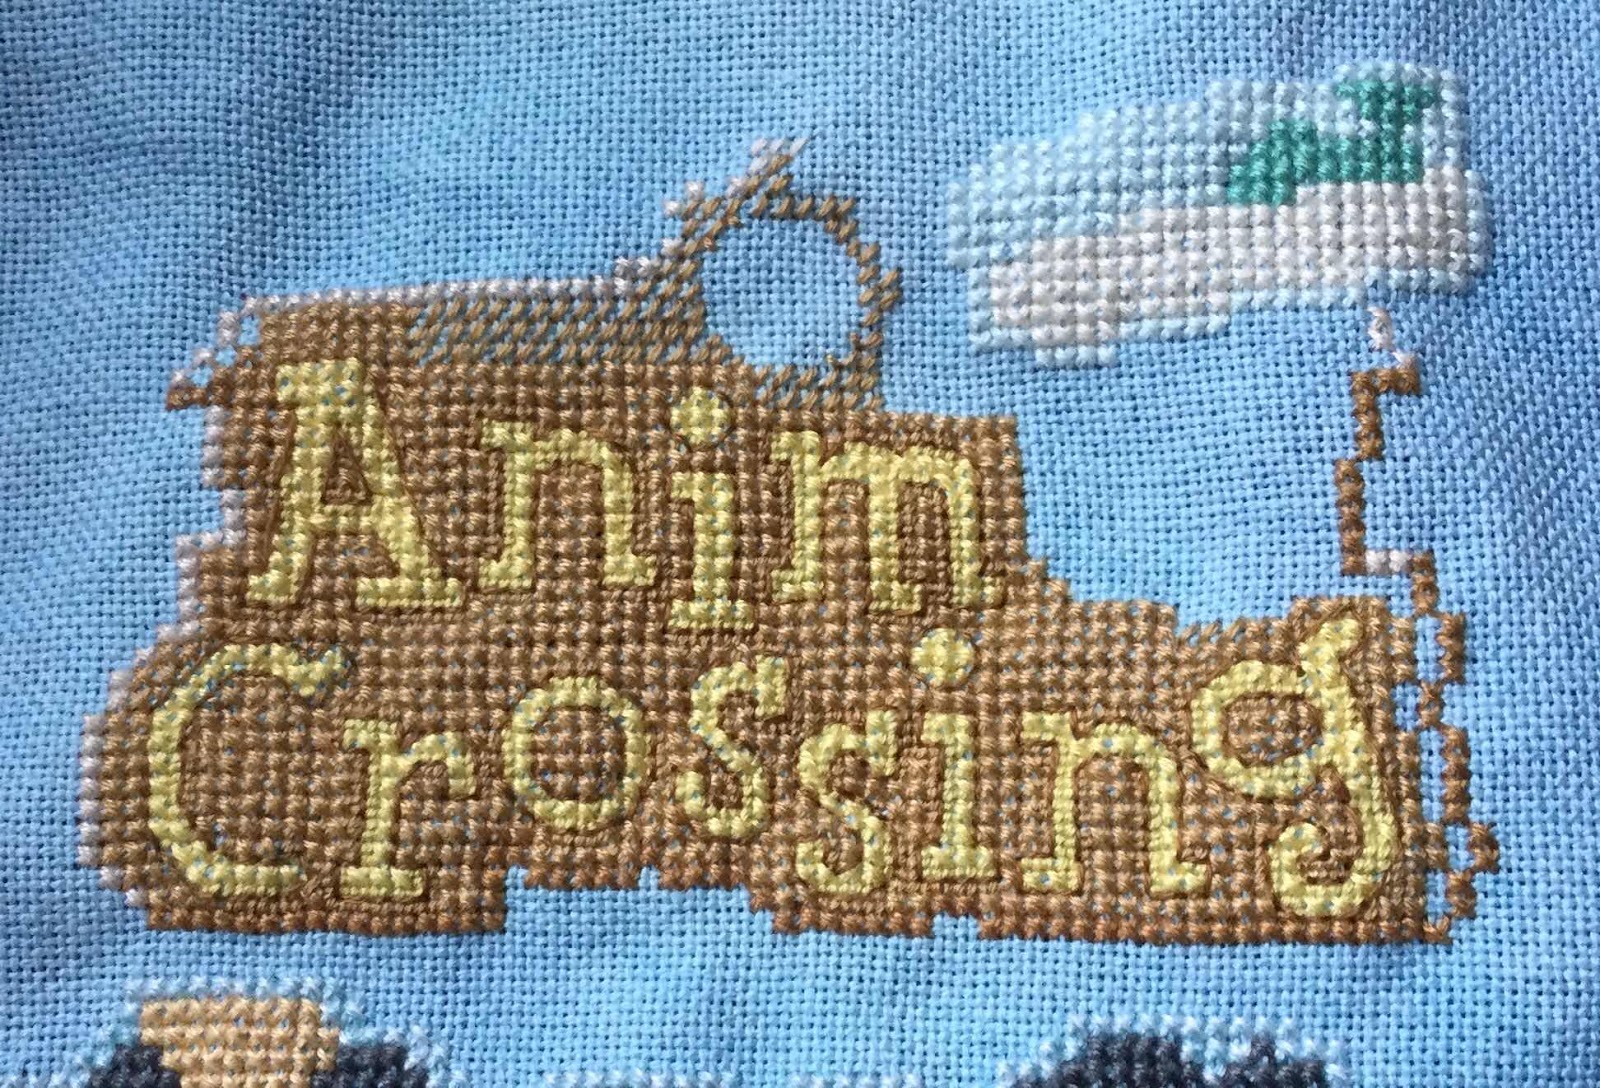

Thursday, 4 February 2021
Animal Crossing - Animal Crossing Logo - update #6
I stitched all of the letter “A”, but still need to backstitch around it.
Wednesday, 3 February 2021
Animal Crossing - Animal Crossing Logo - update #5
Last night I finally finished one word "Crossing". What a pain the "g" was to stitch. I don't know how many times I had to frog before getting it correct. I'm not sure where I lost a stitch, but when I got to the end I was one short from the border. Maybe I made the border one stitch too big. I will leave it until I finish the top word and see if the border is off or my counting inside. Then I'll make the correction or just add the extra stitches.
Tuesday, 2 February 2021
Animal Crossing - Animal Crossing Logo - update #4
Last night I stitched some more letters, I’m almost finished the bottom word.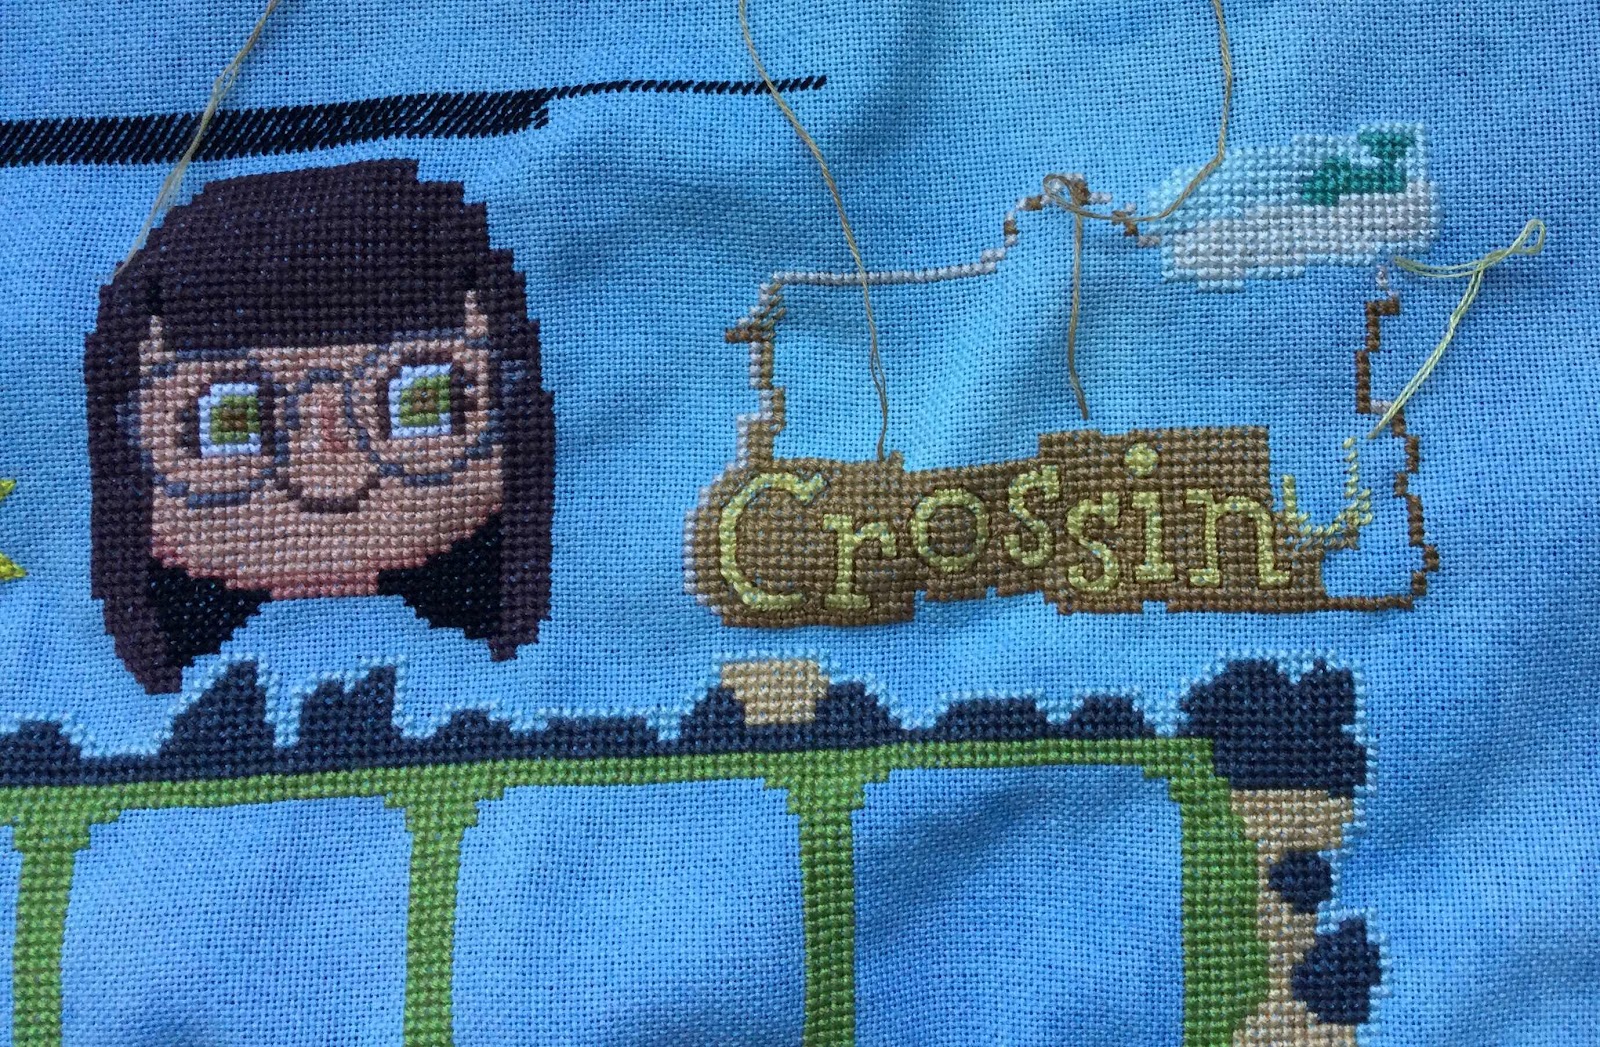
On Saturday, I created a pattern to share with the Facebook Group. The pattern is Jolly Redd’s logo that shows up on your map when he visits (randomly throughout the month). The logo appears on the secret beach (my secret beach is the sandy beach underneath the letter “C” in Crossing. Unfortunately, I had already started stitching the Animal Crossing Logo above my beach and with the fractional stitches, I was definitely not frogging if I didn’t need to. I am thinking of just adding the logo somewhere in the water area near my island to look like Jolly Redd is arriving or has just left.
This is what Jolly Redd looks like in the game. He seems kind of sketchy. It is supposed to represent someone selling you stuff on the black market (not that I would know about that), but I have seen M*A*S*H on TV.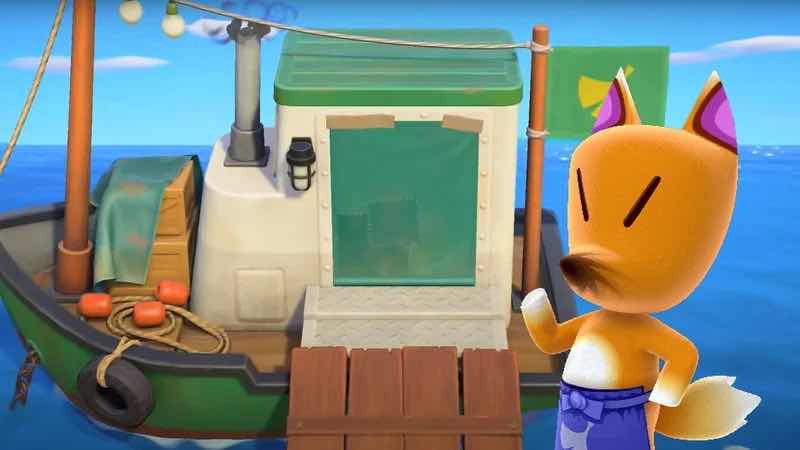

This is how dark and creepy it looks inside when you go to look at the art pieces. I think it is dark so you can’t see the imperfections in the fake art. The art is based on real art, just altered to make them fake. When you donate the real art, you can go and read all about the item. (Artist, date, title, etc). It is very educational.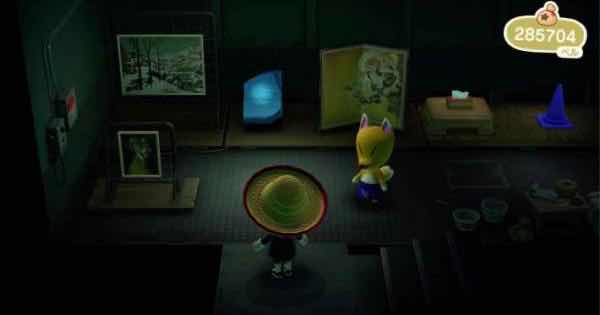
He sells are work to us so we can donate them to our museum. But he doesn’t always bring real art, sometimes it is fake. Sometimes it is very obvious it is a fake painting. The fake painting has eyebrows.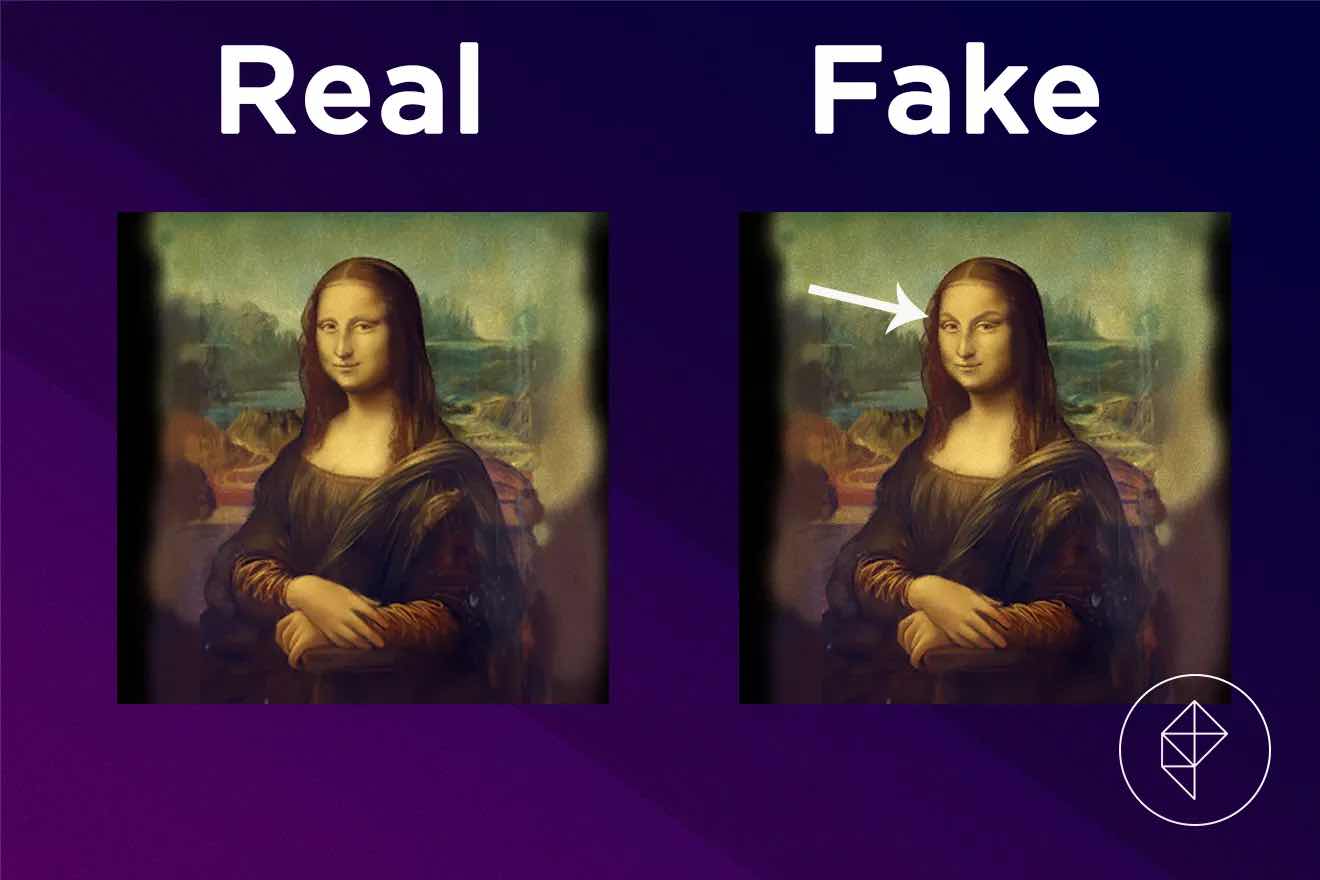
I always double check online to see which painting or statue is the real one, because you can only buy one art piece from Jolly Redd per day (that is why I have 4 characters in case I have to buy all 4 art. He has 4 art each visit. Sometimes they are all real, sometimes they are all fake and sometimes a mix. I can only donate real art pieces to the museum. One of the goals in the game is to complete your museum (80 fish, 80 bugs, 40 sea creatures, 73 dinosaur fossils, 43 art pieces). I have all of the fish, bugs and fossils.
On Saturday, I created a pattern to share with the Facebook Group. The pattern is Jolly Redd’s logo that shows up on your map when he visits (randomly throughout the month). The logo appears on the secret beach (my secret beach is the sandy beach underneath the letter “C” in Crossing. Unfortunately, I had already started stitching the Animal Crossing Logo above my beach and with the fractional stitches, I was definitely not frogging if I didn’t need to. I am thinking of just adding the logo somewhere in the water area near my island to look like Jolly Redd is arriving or has just left.
This is what it looks like on a map (mot my island, this was found online so I could create the logo).
This is what Jolly Redd looks like in the game. He seems kind of sketchy. It is supposed to represent someone selling you stuff on the black market (not that I would know about that), but I have seen M*A*S*H on TV.
Here you can see he puts up anchor on your secret beach. The icon/logo on his flag is the same one above on the map.
This is how dark and creepy it looks inside when you go to look at the art pieces. I think it is dark so you can’t see the imperfections in the fake art. The art is based on real art, just altered to make them fake. When you donate the real art, you can go and read all about the item. (Artist, date, title, etc). It is very educational.
He sells are work to us so we can donate them to our museum. But he doesn’t always bring real art, sometimes it is fake. Sometimes it is very obvious it is a fake painting. The fake painting has eyebrows.
I always double check online to see which painting or statue is the real one, because you can only buy one art piece from Jolly Redd per day (that is why I have 4 characters in case I have to buy all 4 art. He has 4 art each visit. Sometimes they are all real, sometimes they are all fake and sometimes a mix. I can only donate real art pieces to the museum. One of the goals in the game is to complete your museum (80 fish, 80 bugs, 40 sea creatures, 73 dinosaur fossils, 43 art pieces). I have all of the fish, bugs and fossils.
Well that is your lesson for today. :)
Subscribe to:
Posts (Atom)